
Concrete Calculator: Slabs, Patios & Driveways
Accurately calculate cubic yards, concrete bags, total weight, material expenses, and professional installation costs for slabs, footings, patios, and driveways instantly.
Select Project Type
FREE LOCAL CONCRETE QUOTES
Too big for a DIY project? Get free quotes from local concrete pros.
This volume (~3.7 cubic yards) is ideal for a ready-mix truck delivery, though short-load fees may apply for orders under 5 cubic yards. Alternatively, mixing 134 bags of 80 lb concrete will require heavy manual labor or a motorized mixer.
Material Volume Breakdown (Net vs. Waste)
DIY Materials vs. Pro Installation Cost Comparison
How to Use This Concrete Calculator
Accurate concrete estimation eliminates costly shortages and wasteful over-ordering. Follow this detailed walkthrough to measure your site, choose the correct depth, and interpret your yardage totals.
Measure Dimensions
Measure the maximum length and width of your designated pour area using a tape measure or laser measure.
- Use the unit toggle for feet/inches or meters.
- Break complex or L-shaped areas into rectangular sections.
Determine Thickness
Input your required depth in inches based on the anticipated weight load and application type.
- 4 Inches: Standard for patios, walkways, and residential sheds.
- 6+ Inches: Required for driveways, RV pads, and heavy equipment.
Select Pour Method
Choose whether you will order a bulk ready-mix truck or mix individual bags by hand or utility mixer.
- Ready-mix is best for orders exceeding 3 cubic yards.
- Bagged mixes work well for small footings and repairs.
Understanding Cubic Yards vs. Bags
Concrete is universally sold and delivered in cubic yards (cu. yd.), where 1 cubic yard equals 27 cubic feet ($3' \times 3' \times 3'$). Because mixing concrete manually from bags is physically demanding for large volumes, our calculator automatically translates your total volume into standard bag counts (such as 80 lb, 60 lb, or 40 lb bags) so you can compare DIY labor versus hiring a professional crew.
When planning your project, keep in mind standard industry thresholds: ready-mix concrete suppliers usually enforce minimum load requirements or apply short-load fees for orders under 3 to 5 cubic yards.
Why Adding a Waste Factor (5% to 10%) is Critical
Never order the exact mathematical volume of concrete. Sub-grades settle, excavation trenches are rarely uniform, and wooden forms can bow outward under the massive hydrostatic pressure of wet concrete. Including a 5% to 7% waste buffer (or up to 10% for rough, uneven terrain) guarantees you won't run short mid-pour—preventing unsightly cold joints, structural weak points, and expensive emergency concrete deliveries.
The Concrete Calculator for Slabs, Patios & Driveways can help estimate material volumes, yardage requirements, and cost scenarios, but a digital tool cannot physically inspect sub-grade soil conditions, slope drainage, or structural reinforcement needs. Always combine online estimates with professional on-site measurements and local building code compliance.
Concrete Formula & Step-by-Step Math Guide
Master the fundamental math behind concrete estimation. Learn how cubic yards are derived, why thickness conversion matters, and how to calculate your project volume by hand.
The Core Concrete Formula (Featured Answer)
To calculate the volume of concrete required for any rectangular slab, multiply your length, width, and thickness (all measured in feet), then divide the total product by 27 to convert cubic feet into cubic yards.
Because concrete thickness is almost always measured in inches (e.g., 4" or 6"), you must convert it into fractional feet before multiplying. Divide your depth in inches by 12. For example, a 4-inch slab becomes 4 ÷ 12 = 0.333 feet deep.
Multiply your converted Length (ft) x Width (ft) x Thickness (ft). This gives you the total volume of your pour expressed in cubic feet (ft³). This is the raw space your concrete formwork will occupy.
Ready-mix concrete trucks sell material by the cubic yard. Because 1 cubic yard equals a cube measuring 3 feet on every side (3' x 3' x 3' = 27 cubic feet), you divide your total cubic feet by 27 to get your final yardage.
Multiply your calculated cubic yards by your waste factor multiplier (1.05 for 5% waste or 1.07 for 7% waste). This safeguards your project against sub-grade irregularities, wooden form deflection, and spillage.
Worked Practical Example: Pouring a 20' x 15' x 4" Patio Slab
Let's walk through an exact calculation for a standard residential patio measuring 20 feet long, 15 feet wide, with a 4-inch thickness:
- Convert thickness: 4 inches ÷ 12 = 0.333 feet.
- Calculate cubic feet: 20 ft (Length) x 15 ft (Width) x 0.333 ft (Thickness) = 100 cubic feet.
- Convert to cubic yards: 100 cu. ft ÷ 27 = 3.70 cubic yards (exact mathematical volume).
- Add a 7% waste buffer: 3.70 x 1.07 = 3.96 cubic yards total to order.
Concrete Volume Calculator
Calculate the concrete volume needed for slabs, patios, driveways, and other rectangular projects. Results update automatically as you enter your dimensions.
Enter Your Project Details
Enter the length, width, and thickness of your concrete project.
Total project length in feet.
Total project width in feet.
Common slab thicknesses range from 4 to 6 inches, depending on the project.
Includes a standard 7% waste allowance. Actual ordering quantities may vary.
The Concrete Formula & Math Breakdown
1 Convert Inches to Feet
Divide the thickness in inches by 12. For example, a 4-inch slab equals 4 ÷ 12 = 0.333 feet.
2 Calculate Cubic Feet
Multiply the length, width, and thickness in feet to calculate the total cubic feet of concrete required.
3 Convert to Cubic Yards
Divide the total cubic feet by 27 because one cubic yard contains 27 cubic feet.
4 Add a Waste Allowance
Multiply the calculated volume by 1.07 to add a standard 7% allowance for measurement differences and uneven surfaces.
Embed This Concrete Calculator
Copy the iframe code below to display the official Calculante-hosted calculator on another website. The calculator remains hosted by Calculante.
Standard Concrete Thickness Recommendations by Project Type
Choosing the correct concrete slab thickness is essential for structural stability and longevity. Explore standard planning ranges, load factors, and site requirements for residential flatwork and concrete projects.
Quick Answer: How Thick Should Concrete Be?
Many common residential flatwork projects—such as backyard patios, walkways, and light-duty sidewalks—are traditionally planned at approximately 4 inches of thickness. However, higher-load environments like residential driveways, garage floors, parking pads, and structural foundations frequently require 5 to 6 inches or greater. Thickness should never be treated as a universal standard; it must be determined by vehicle traffic, underlying soil conditions, expected loads, and local building codes.
| Project Type | Common Planning Range | Typical Use | Important Considerations |
|---|---|---|---|
| Residential Sidewalks & Walkways | 3.5 to 4 inches | Pedestrian foot traffic, light residential access | Requires a stable, compacted subgrade to prevent shifting and cracking. |
| Patios | 4 inches | Outdoor living, patio furniture, light foot traffic | Proper drainage slope and control joints are vital to prevent pooling and random cracking. |
| Residential Driveways | 4 to 6 inches | Standard passenger cars, light trucks, everyday vehicle parking | Consider 6 inches or reinforcement if parking heavy SUVs, trucks, or recreational vehicles. |
| Garage Floors | 4 to 6 inches | Vehicles, workshop equipment, domestic storage loads | Thicker specifications (5–6 inches) are recommended near garage entries and heavy load zones. |
| Shed Slabs | 4 inches (varies) | Garden sheds, storage units, lawn equipment enclosures | Thicker thickened edges or footings are often needed if supporting heavy riding mowers or machinery. |
| Parking Pads | 5 to 6 inches | Dedicated vehicle parking, commercial van or truck access | Demands high compressive strength and a robust compacted aggregate base. |
| Pool Decks | 4 inches | Pedestrian barefoot traffic surrounding swimming pools | Requires positive drainage slopes away from the pool structure and slip-resistant finishes. |
| Heavy-Duty / Commercial Areas | 6+ inches (Engineered) | Commercial traffic, heavy machinery, industrial storage | Must be evaluated by a structural engineer based on exact load requirements and local codes. |
Sidewalks & Walkways
Designed for daily foot traffic. Typically poured at 4 inches over a stable subgrade to handle weather cycles comfortably.
Patios
Standard outdoor living slabs use 4 inches of concrete mix. Adequate subbase prep protects against settling under furniture or hot tubs.
Driveways
Subject to moving vehicle weights. Standard range is 4 to 6 inches depending on soil quality and whether light trucks use the space.
Garage Floors
Must support parked vehicles and static equipment weight. Usually specified at 4 to 6 inches with proper subgrade compaction.
Shed & Outdoor Slabs
Thickness varies based on building size and stored items. Basic sheds use 4 inches, while heavy workshops require reinforced edges.
Parking Pads
Engineered for sustained vehicle weight. 5 to 6 inches is common to prevent rutting, subgrade failure, and premature cracking.
Pool Decks
Standard 4-inch pedestrian slabs engineered with precise slopes to manage water runoff safely away from pool edges.
Heavy-Duty Areas
Exceeds standard residential specs. Requires engineered designs of 6 inches or more to withstand industrial loads and truck traffic.
What Determines the Right Concrete Thickness?
Selecting an appropriate concrete slab thickness involves analyzing several physical and environmental factors. No single measurement fits every project. Key design variables include:
- Expected Loads and Traffic: Pedestrian walkways experience minimal stress compared to driveways or commercial parking areas subjected to heavy vehicle loads.
- Soil Type and Bearing Capacity: Stable soils support slabs evenly, whereas expansive or soft clay soils require thicker profiles or specialized reinforcement.
- Subbase and Compaction: A well-graded, compacted aggregate base distributes weight uniformly and prevents localized settlement.
- Drainage and Moisture: Proper site drainage prevents water accumulation beneath the slab, mitigating erosion and subgrade softening.
- Freeze-Thaw Cycles & Frost Heave: In colder climates, freezing moisture in the ground can expand and crack thin slabs unless depth and base layers are properly engineered.
- Concrete Strength and Mix Design: Compressive strength (measured in PSI) works hand-in-hand with thickness to resist surface wear and structural bending.
- Reinforcement & Joints: Rebar, welded wire mesh, and control joints help manage internal tensile stresses, though reinforcement cannot compensate for an undersized slab.
- Local Building Codes: Municipal regulations often dictate minimum thickness standards for specific residential applications like driveways and garage aprons.
When Is Thicker Concrete Necessary?
Certain site conditions and operational demands call for increasing concrete thickness beyond standard planning guidelines. You should consider upgrading to thicker specifications or consulting a professional if your project involves:
- Frequent or heavy vehicle traffic, commercial vans, or delivery trucks.
- Recreational vehicles (RVs), boats, or heavy trailers parked on residential pads.
- Poorly compacted, loose, or highly variable subgrade soils.
- Expansive clay soils prone to severe seasonal shifting.
- Freezing climates with high risk of frost heave.
- Inadequate natural drainage or high water tables.
- Structural foundation requirements or point loads from heavy machinery.
Remember that thickness, base preparation, mix quality, and joint design must work together as a complete system for long-term performance.
Concrete Thickness vs. Base Preparation
A common misconception is that pouring thicker concrete can solve underlying structural problems on a poorly prepared site. In reality, subbase preparation is just as important as the concrete layer itself.
Pouring 6 inches of concrete over loose, uncompacted soil will still result in settling, cracking, and structural failure. Achieving a durable slab requires:
- Removal of Unsuitable Soil: Stripping organic topsoil and debris before building up the pad.
- Compacted Aggregate Base: Installing a compacted gravel subbase (typically 4 inches of crushed stone) to provide uniform load support and drainage.
- Moisture Management: Grading the subgrade away from structures to prevent pooling water.
- Edge Support: Ensuring formwork and perimeter edges are stable to prevent blowout during pouring and compaction.
Uniform Assumptions
Assuming that a 4-inch thickness is universally appropriate for every residential project, including high-load driveways.
Ignoring Subgrade
Skipping proper soil compaction and aggregate base preparation, leading to subgrade settling and eventual slab fracture.
Over-relying on Steel
Treating reinforcement (rebar or mesh) as a substitute for adequate slab thickness and correct structural design.
Ready to Estimate Your Materials?
Once you have determined the appropriate thickness and dimensions for your project, you can use the Calculante Concrete Calculator to quickly estimate the exact volume of concrete, total weight, bag counts, and material costs required for your slabs, patios, or driveways.
While our Concrete Calculator provides reliable volume estimates and cost approximations for your slabs, patios, and driveways, it cannot account for unseen sub-base stability, precise local weather curing factors, or specialized structural load requirements. Always consult with an experienced local contractor to verify measurements and specifications before ordering materials.
Ready-Mix Truck vs. Bagged Concrete: Which Should You Choose?
Deciding between ordering a ready-mix concrete delivery truck or purchasing individual bags of dry mix depends on your project scale, labor availability, jobsite access, and budget.
Quick Comparison: Trucks vs. Bags
Bagged Concrete: Homeowners purchase individual dry mix bags, transport them, mix them on-site using a wheelbarrow or portable concrete mixer, and place the material manually. This method is practical for small repairs, fence post footings, and minor flatwork where the total volume is relatively low.
A half-yard project can require roughly 23–25 standard 80-lb bags, depending on the manufacturer's stated yield. That means moving roughly 1,840–2,000 lb of dry concrete mix before adding water and mixing it on-site. For a small project, bags may still be practical because you avoid a ready-mix delivery minimum.
Ready-Mix Concrete: Pre-mixed concrete is delivered directly to your jobsite by a mixing truck. It is generally more efficient for larger, continuous pours such as driveways, garage floors, and substantial patios, provided the truck can safely access the placement area.
A 3-cubic-yard driveway pour would represent about 81 cubic feet of concrete. Trying to produce that volume from 80-lb bags could require roughly 135–150 bags, depending on bag yield. A ready-mix truck can deliver the required volume in one coordinated delivery, shifting the main challenge from mixing to placing and finishing the concrete quickly.
| Factor | Ready-Mix Concrete | Bagged Concrete |
|---|---|---|
| Best Suited Project Size | Large projects, continuous pours, slabs over 1–2 cubic yards | Small repairs, footings, minor walkways, segmented projects |
| Purchase Method | Ordered by volume (cubic yards) from a local batch plant | Purchased individually by the bag from home improvement stores |
| Mixing Requirements | Mixed continuously in transit inside the delivery truck drum | Mixed manually or mechanically on-site using water |
| Labor Needs | Lower on-site mixing labor; higher focus on rapid placement and finishing | High physical labor for handling bags, mixing, and wheeling material |
| Placement Speed | Fast discharge; requires an organized team to place quickly | Slower, controlled pace batch-by-batch |
| Consistency | Computer-batched plant quality with consistent structural properties | Varies depending on exact water measurements per batch |
| Equipment Requirements | Chutes, wheelbarrows, screeds, floats, optional concrete pump | Wheelbarrow, shovel, hoe, or portable mechanical mixer |
| Delivery & Transportation | Delivered by heavy commercial truck (requires good access) | Transported in a car, truck bed, or trailer in manageable loads |
| Cost Considerations | Cost-effective for bulk volumes; subject to delivery/short-load fees | Economical for small jobs; high unit cost per yard for large volumes |
| Waste & Leftover Material | Exact ordering required; ordering too little or too much incurs cost/disposal issues | Easy to buy a few extra bags and return unopened ones |
| Jobsite Access | Requires clear, stable roadway access and overhead clearance for a truck | Can be hand-carried to remote or restricted backyard areas |
| Finishing Coordination | Must finish quickly before the large batch sets | Easier to pace finishing work across separate batch cycles |
| Flexibility for Small Batches | Impractical and expensive for micro-projects due to minimum load fees | Ideal for mixing precisely what is needed for small tasks |
| Larger Continuous Pours | Designed for seamless monolithic pours without cold joints | Challenging to blend multiple hand-mixed batches seamlessly over large areas |
Small Concrete Repairs
Ideal for patching spalled surfaces, filling steps, or repairing cracked steps where only a fraction of a cubic foot is needed.
Fence Posts & Footings
Perfect for setting posts or mailboxes. Bags can be mixed individually or poured dry and water added directly into the hole depending on mix guidelines.
Small Garden Paths
Allows homeowners to build stepping stone paths or short walkway sections at their own pace without delivery minimum constraints.
Limited-Volume Projects
Eliminates the financial penalty of truck delivery fees when your total volume is well under standard supplier thresholds.
Projects Built in Stages
Enables weekend DIYers to tackle complex formwork or multi-stage pours incrementally without pressure from a ticking delivery clock.
Limited-Access Locations
Solves site access dilemmas when backyards, courtyards, or narrow side gates prevent heavy commercial trucks from reaching the pour site.
Large Patios
Delivers the high volume needed for expansive backyard living spaces, ensuring a uniform, continuous slab surface.
Residential Driveways
Essential for multi-yard driveway slabs where hand-mixing dozens of bags would result in inconsistent curing and cold joints.
Garage Floors
Provides the continuous volume required for smooth, flat garage slabs capable of handling vehicle weight without structural weak points.
Large Workshop Slabs
Streamlines placement for heavy-duty outbuilding foundations, saving hours of exhausting manual labor.
Continuous Pours
Prevents structural flaws by filling formwork in one seamless operation rather than piecing together independent batches.
Limited Mixing Labor
Allows a small crew to focus entirely on screeding, floating, and finishing rather than spending hours hauling water and mixing bags.
Cost Comparison: What Should You Include?
When evaluating project expenses, looking solely at the sticker price of a bag versus the quoted price of delivered ready-mix concrete can be misleading. True project cost encompasses total material logistics, labor, and equipment.
For Bagged Concrete: Calculate the total number of bags required based on yield, plus transportation fuel, water access, rental or purchase of a mechanical mixer, and the value of your physical labor or helper expenses. Unopened bags can often be returned, reducing waste costs.
For Ready-Mix Concrete: Evaluate the cubic yard price along with supplier delivery fees, minimum order quantities, short-load fees, potential pump truck rentals for hard-to-reach areas, and the cost of a finishing crew to place the material before it sets.
How Much Concrete Do You Need?
Calculating your project volume accurately is the critical first step before choosing between bags and trucks. Concrete volume is measured in cubic feet or cubic yards.
Bagged concrete packaging typically states how many bags are required to yield one cubic yard of mixed concrete. For example, standard 80-pound bags often require roughly 45 to 50 bags per cubic yard, depending on the manufacturer's stated yield. Ready-mix suppliers sell material directly by the cubic yard, usually with minimum order requirements. Always include an appropriate waste allowance for subgrade irregularities and spillages regardless of which supply route you choose.
Labor, Time, and Physical Effort
The physical demands of your chosen supply method heavily influence project success. Mixing dozens or hundreds of heavy concrete bags by hand or with a small mixer is grueling physical labor that takes hours and can lead to fatigue before finishing even begins.
Conversely, a ready-mix truck arrives with all material pre-blended, but it discharges quickly. This shifts the labor demand from mixing to fast-paced placement, screeding, edging, and floating. You must have your formwork, subbase, tools, and helpers fully prepared before the truck arrives.
Access and Delivery Considerations
Jobsite logistics often dictate your choice. Before scheduling a heavy ready-mix truck, evaluate the following site conditions:
- Can a heavy commercial truck reach your pour location without damaging driveways, curbs, or underground utilities?
- Is there adequate overhead clearance free of low-hanging tree branches and power lines?
- Can the truck safely maneuver and turn around, or will it require long chute extensions or a concrete pump?
- Is your subbase, compaction, and formwork completely finished and inspected prior to delivery?
Quality and Consistency Considerations
Ready-mix concrete is batched in industrial plants with strict quality control, computerized weighing, and consistent aggregate blending, ensuring uniform structural strength.
Bagged concrete relies on correct water measurement for every single batch. Adding too much water to speed up hand mixing weakens the cured concrete and increases shrinkage cracking. Maintaining strict discipline with water ratios across multiple hand-mixed batches is essential for structural integrity.
Questions to Ask Before Choosing Your Concrete Supply Method
- ☑ What is the total volume? Is the project under a fraction of a yard or multiple cubic yards?
- ☑ Can a truck access the site? Are there weight limits, gate restrictions, or soft soil obstacles?
- ☑ Do I have enough labor? Can I handle manual mixing, or do I have a crew ready for a truck discharge?
- ☑ What are the total costs? Does truck delivery incur short-load fees that make bags more economical?
- ☑ What is the timeline? Do I need to work in stages, or is a single continuous pour required?
Bagged Concrete May Be Practical When:
- The project is small or localized.
- Total volume is low.
- Truck access is restricted or impossible.
- Work must be completed in stages.
- You prefer pacing your own labor.
Ready-Mix May Be Practical When:
- The project requires large volume.
- A continuous, seamless pour is vital.
- Good truck access is available.
- Adequate placement crew is ready.
- Speed and uniformity are priorities.
Professional Planning May Be Needed When:
- The slab supports heavy vehicular loads.
- Foundations are structural.
- Soil conditions are unstable.
- Local building codes apply.
- Complex reinforcement is required.
Estimate Your Volume Before You Decide
Before comparing bagged concrete pricing with ready-mix delivery quotes, determine your project volume. The Calculante Concrete Calculator helps homeowners calculate cubic feet, cubic yards, and material requirements for slabs, patios, driveways, and other concrete projects.
Use the Concrete Calculator as a helpful planning guide to estimate cubic yards, bags, and overall material expenses for your project, but remember that variables like uneven terrain, excavation depths, and site-specific waste can alter final quantities. Always verify your figures and site prep requirements with a licensed professional before starting construction.
FREE LOCAL CONCRETE QUOTES
Too big for a DIY project? Get free quotes from local concrete pros.
Concrete Cost Estimator: Slabs, Patios & Driveways
Planning your budget starts with understanding how concrete pricing works. Whether you need a comprehensive concrete cost estimator or want to break down concrete cost per square foot and concrete cost per cubic yard, this guide outlines typical expenses for materials versus professional contractor installation.
| Project Type | Material-Only Cost | Installed Cost | Typical Cost Basis | What Drives the Difference |
|---|---|---|---|---|
| Basic Concrete Slab | $2 – $4 per sq. ft. | $6 – $12 per sq. ft. | Square footage & thickness | Subgrade grading, formwork, finishing labor, and delivery fees. |
| Concrete Patio | $2.50 – $4.50 per sq. ft. | $8 – $18 per sq. ft. | Surface area & shape complexity | Site excavation, access constraints, and decorative finishes (stamped/stained). |
| Concrete Driveway | $3 – $6 per sq. ft. | $8 – $16 per sq. ft. | Surface area & vehicle load specs | Thicker slab requirements (4–6 inches), heavy base prep, and reinforcement. |
How Much Does Concrete Cost per Square Foot?
When evaluating a concrete slab cost or budgeting for flatwork, pricing is most commonly calculated per square foot. Material-only expenses typically cover just the dry mix or ready-mix concrete truck delivery, whereas installed pricing encompasses the total scope of execution.
Project size plays a major role in your overall concrete installation cost. Smaller projects often feature a higher effective per-square-foot cost because fixed expenses—such as equipment mobilization, delivery minimums, and short-load fees—are distributed over a smaller total surface area.
How Much Does Concrete Cost per Cubic Yard?
Ready-mix concrete is industrially batched and sold by volume. Understanding ready-mix concrete cost requires separating raw material volume pricing from total installed expenses. While standard ready-mix concrete generally ranges between $125 and $175 per cubic yard nationally, this figure represents only the material delivered to your site.
A professional contractor quote incorporates much more than the raw volume. Total pricing includes delivery logistics, short-load fees for smaller orders, pumping equipment if truck access is limited, labor, grading, forming materials, reinforcement, and finishing. Use a reliable Concrete Calculator or Concrete Volume Calculator to estimate your required yardage before requesting bids.
Material Only
Covers the raw cost of ready-mix concrete or individual bags, letting DIYers manage their own transport, mixing, forming, and finishing.
Professional Installation
Wraps all labor, equipment, site preparation, base compaction, forming, pouring, finishing, and site cleanup into a single contractor bid.
Why Quotes Vary
Two contractors can quote different prices based on localized labor rates, jobsite accessibility, soil conditions, and specific reinforcement choices.
What Is Included in Professional Concrete Installation?
When hiring a concrete contractor, reviewing line-item inclusions is critical to understanding your concrete project cost. A comprehensive installation bid typically covers:
- Site Preparation: Stripping organic topsoil, excavation, and rough grading.
- Base Preparation: Laying and compacting a crushed aggregate subbase to support uniform loads.
- Formwork: Constructing precise wooden or metal boundaries to hold wet concrete.
- Reinforcement: Installing rebar grids or welded wire mesh where specified.
- Placement & Pouring: Discharging, spreading, and screeding the concrete level.
- Finishing & Joints: Applying standard broom textures or decorative finishes, alongside cutting control joints.
- Cleanup: Dismantling forms and hauling away construction debris.
Always compare the complete scope of work across multiple bids rather than selecting solely on the lowest bottom-line figure.
Concrete Slabs (Garage & Utility)
Utility and garage slabs demand higher load capacities. Because they frequently require thicker profiles (5 to 6 inches) and heavy base compaction, overall concrete slab cost tends to run toward the higher end of standard flatwork ranges.
Concrete Patios
A concrete patio cost varies heavily based on shape complexity, site grading, and surface treatments. Standard broom finishes are budget-friendly, while stamped, colored, or exposed aggregate finishes increase labor and material expenses.
Concrete Driveways
A concrete driveway cost reflects heavy demands: handling vehicle weight requires robust subbase preparation, thicker concrete cross-sections, and careful joint planning to prevent premature cracking under everyday traffic.
Project Size
Larger surface areas generally decrease the effective per-square-foot cost due to optimized equipment and delivery efficiency.
Site Preparation
Extensive excavation, complex grading, or the removal of old asphalt and concrete add labor and disposal fees.
Jobsite Access
Restricted backyards or tight side gates prevent trucks from reaching the site, requiring wheelbarrows, buggies, or concrete pumps.
Thickness & Specs
Deeper pours and specialized high-PSI commercial mixes increase total raw material volumes and overall expenses.
Reinforcement
Adding structural rebar grids, fiber mesh, or specialized wire reinforcement increases both material and installation labor costs.
Local Market
Regional labor markets, local contractor demand, fuel costs, and material transport distances heavily influence final pricing.
Illustrative Example: Estimating a Patio Project
To see how these variables come together, consider an illustrative example of a homeowner planning a standard 600-square-foot backyard concrete patio.
Assuming a standard professionally installed rate averaging around $10 to $14 per square foot for basic flatwork in many markets, the total baseline project quotation would land roughly between $6,000 and $8,400. This estimated total accounts for site grading, compacted aggregate base installation, formwork, ready-mix concrete delivery, labor, finishing, and control joint cutting. Opting for decorative stamping or dealing with difficult backyard access could push totals higher.
While our Concrete Calculator serves as an essential resource for planning material volumes and budgeting expenses, it is designed for estimation purposes only and cannot replace professional engineering advice. Always have a qualified contractor review your site layout, soil conditions, and load specifications before beginning any concrete pour.
Sub-Base Preparation & Gravel Requirements
A durable concrete slab, patio, or driveway relies heavily on more than just the concrete mix itself. Proper concrete sub-base preparation ensures uniform support, prevents shifting, and protects your flatwork from premature cracking and settlement.
Why You Shouldn't Pour Concrete Over Loose Dirt
A common question homeowners ask is: Can you pour concrete directly on dirt? While it is physically possible, pouring concrete over loose, uncompacted topsoil or poorly prepared ground frequently leads to structural distress.
The primary concern is not the soil itself, but rather its stability, organic content, and moisture reactivity. If supporting earth shifts, settles unevenly, or washes away due to poor drainage, the rigid concrete slab loses uniform support. This differential movement increases the risk of cracking, sinking, and uneven surface sections.
What Is a Concrete Sub-Base?
Understanding flatwork terminology helps clarify how a pavement structure functions. Construction projects generally separate the ground layers into distinct tiers:
- Subgrade: The underlying native soil or ground prepared to receive the project loads.
- Sub-Base: An intermediate aggregate layer placed directly above the subgrade and beneath the concrete slab.
- Base Material: Crushed stone, gravel, or compactable aggregate selected to distribute loads and manage moisture.
A properly installed gravel base for concrete acts as a stable load-bearing platform, improves drainage beneath the slab, reduces frost-heave potential in colder climates, and provides an even working surface for construction.
How Much Gravel Should Go Under Concrete?
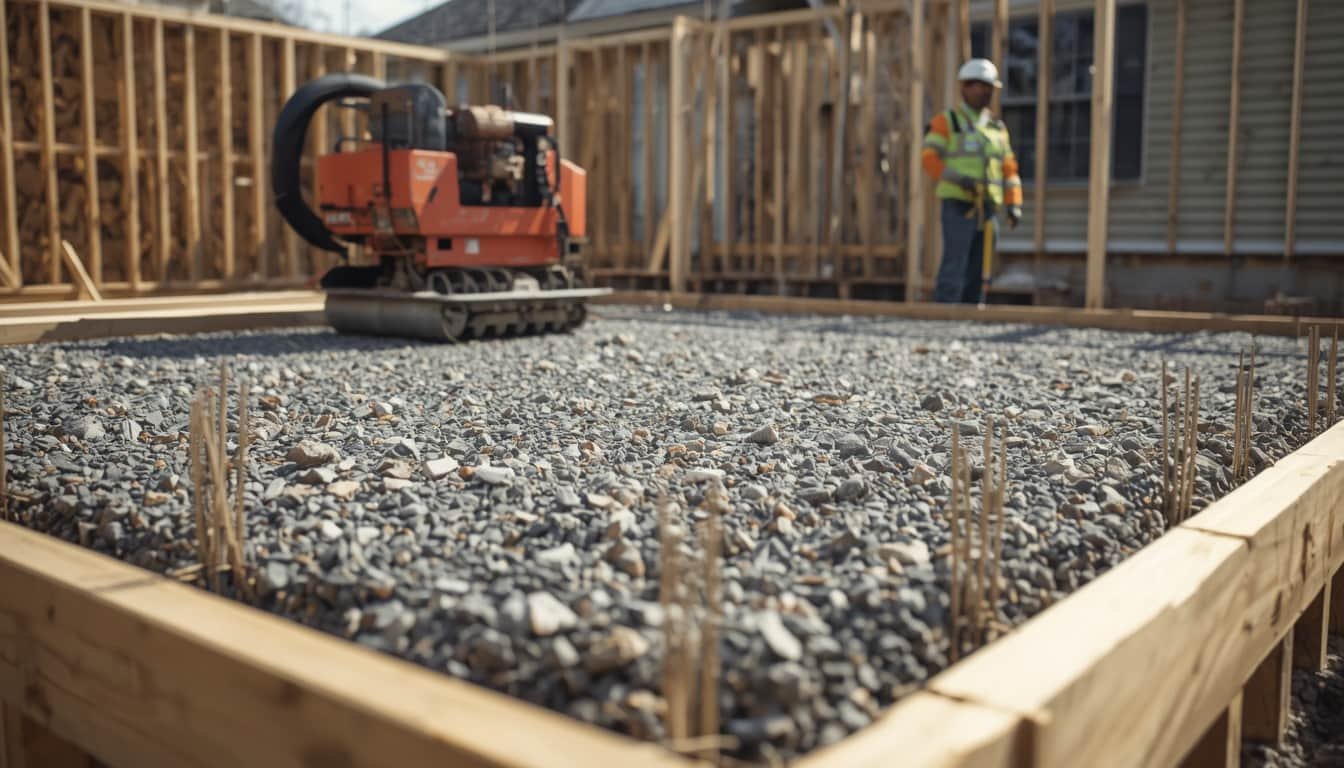
For many residential flatwork applications, approximately 4 inches of compacted crushed stone or gravel serves as a standard baseline starting point. However, this is not a universal code requirement.
Actual gravel base thickness depends heavily on project parameters, including expected vehicle loads, soil conditions, drainage profiles, climate, and local building requirements. While backyard patios and walkways may require a modest aggregate layer, residential driveways often call for a deeper, more robustly compacted base to handle heavy vehicle traffic.
Compacted Gravel vs. Loose Gravel: Why the Difference Matters
When calculating materials, homeowners must distinguish between loose and compacted depths. Aggregate placed on a jobsite occupies significantly more volume before mechanical compaction than it does afterward.
Ordering material based strictly on an uncompressed depth measurement can leave you short once the aggregate settles during spreading, grading, and compaction. Factoring for compaction shrinkage ensures you order adequate material volumes for the job.
Clay & Expansive Soils
Highly reactive soils swell with moisture and shrink when dry, requiring careful subgrade preparation and stable aggregate layers to mitigate movement.
Sandy & Loose Soils
Loose sandy soils lack internal cohesion and demand thorough mechanical compaction to achieve a stable bearing surface for flatwork.
Wet & Poor Drainage
Poorly drained soils trap moisture beneath the slab, increasing the risk of frost heave and requiring specialized sub-base and drainage integration.
What Type of Gravel Goes Under Concrete?
Contractors typically specify well-graded crushed aggregate or crushed stone rather than smooth, rounded decorative gravel.
Angular crushed particles lock together mechanically under compaction, forming a rigid, stable load-bearing mat. In contrast, rounded pea gravel or loose stone acts like tiny ball bearings, shifting under weight and failing to provide a solid structural foundation.
How to Calculate Gravel for a Concrete Base
Estimating aggregate volume follows a straightforward spatial formula based on project dimensions and targeted compacted depth:
Project Area (Sq. Ft.) × Compacted Depth (Fraction of a Foot) = Compacted Volume (Cu. Ft.)
Illustrative Example: For a 600-square-foot patio (e.g., 20 ft × 30 ft) requiring a 4-inch compacted base (1/3 of a foot):
- 600 sq. ft. × (1/3 ft) = 200 cubic feet of compacted aggregate (approximately 7.4 cubic yards).
- The actual amount of loose aggregate ordered must account for material compaction and settling during placement.
Stable Support
A uniform sub-base distributes heavy surface loads evenly across the subgrade, minimizing local stress concentrations.
Moisture Control
Open-graded crushed stone creates a capillary break, helping manage subsurface water movement beneath the concrete slab.
Reduced Settlement
Proper grading and mechanical compaction prevent post-pour shifting, protecting structural integrity and surface alignment.
Gravel Base Calculator
Estimate the compacted gravel or crushed aggregate needed beneath your concrete slab, patio, driveway, or walkway project instantly.
Project Dimensions
Estimated Results
Planning Guidance: Typical residential concrete flatwork applications often utilize a compacted aggregate base, but required depths vary based on soil conditions, climate, anticipated vehicle loads, drainage, and local construction requirements.
Note on 4 Inches: While 4 inches of compacted crushed stone serves as a common starting baseline for many residential slabs and patios, it is not a universal code requirement for all site conditions.
Embed Gravel Base Calculator
Copy the HTML code below to embed this official calculator directly on your website or project page.
Proper sub-base preparation is critical for the long-term durability of any slab, patio, or driveway. While our Concrete Calculator can estimate basic gravel volumes, actual sub-base depths may vary depending on local soil bearing capacity, freeze-thaw cycles, and expected traffic loads. Always ensure your sub-grade is thoroughly compacted and verified against local geotechnical requirements before pouring.
Planning a Retaining Wall Project?
Retaining wall projects often require careful planning for the concrete base, gravel, drainage, and overall wall construction. Use the Calculante Retaining Wall Cost Calculator to estimate potential project costs and build a more realistic budget before getting contractor estimates.
Retaining Wall Cost CalculatorReinforcement Guide: Rebar vs. Wire Mesh
Concrete reinforcement helps control cracking and enhances structural performance across flatwork applications. Understanding the distinctions between welded wire mesh and reinforcing rebar ensures proper selection for concrete slabs, patios, and driveways.
What Does Reinforcement Do in Concrete?
Concrete is exceptionally strong under compressive forces (pushing weight down), but it has relatively low tensile strength (resistance to pulling or bending forces). When concrete cures, dries, shifts under loads, or experiences temperature fluctuations, internal tensile stresses develop.
Concrete reinforcement is introduced to help control crack widths, distribute tensile stresses, and improve overall slab performance. It helps concrete tolerate movement and provides additional structural capacity when designed into the project. It is important to distinguish between crack-control reinforcement, which manages minor shrinkage cracking, and structural reinforcement designed to handle heavy vehicle loads or demanding site stresses.
Neither wire mesh nor reinforcing rebar guarantees that concrete will never crack. Instead, quality reinforcement ensures that if cracks do form, they remain tightly controlled rather than widening and compromising the flatwork.
Welded Wire Mesh
What it is: A grid of cold-drawn steel wires welded together at regular intersections, typically supplied in flat sheets or rolls.
Common Applications: Residential concrete slabs, sidewalks, light-duty patios, and non-structural flatwork.
Key Advantages: Effective for basic crack control and relatively easy to roll out or position in thinner residential slabs.
Limitations: Offers lower structural load capacity than rebar grids; can be easily flattened to the subgrade if not properly supported during placement.
Reinforcing Rebar
What it is: Individual deformed steel bars featuring surface ridges that provide superior mechanical bonding with surrounding concrete.
Common Applications: Concrete driveways, commercial paving, structural foundations, heavily loaded slabs, and retaining walls.
Key Advantages: Provides high tensile strength and structural rigidity, making it ideal for high-stress applications and vehicle traffic.
Limitations: Requires precise tying and bar sizing; more labor-intensive to install than rolled wire reinforcement.
When Is Wire Mesh Enough for Concrete?
Welded wire mesh for concrete can be completely appropriate in certain residential and light-duty applications when properly specified and installed. Projects such as backyard patios, residential walkways, and light-traffic concrete slabs often utilize welded wire reinforcement to manage minor drying shrinkage and thermal cracking.
However, suitability depends on slab design, anticipated loads, subgrade soil conditions, slab thickness, and environmental exposure. Wire mesh should never be selected simply because it is cheaper or easier to handle. Furthermore, mesh placement is critical: mesh resting directly on the subgrade provides virtually no benefit compared to mesh supported at the proper mid-slab or upper-third elevation.
When Should I Use Rebar Instead of Wire Mesh?
A structural rebar grid becomes necessary when flatwork faces heavier mechanical demands. Rebar for a concrete slab or driveway provides the structural integrity required to distribute heavy vehicular loads without failing.
Situations calling for rebar include concrete driveways supporting regular car or truck traffic, larger industrial slabs, expansive or poorly compacted soils, areas subject to frost heaving, and structural foundations. When engineering plans or local building codes specify reinforcing bars, those specifications must be followed closely to ensure long-term durability.
What Is the Difference Between #3 and #4 Rebar?
Reinforcing bars are categorized by nominal diameter sizes. In residential and light commercial flatwork, #3 rebar and #4 rebar are the most frequently encountered sizes.
| Rebar Size | Approximate Diameter | Typical Context |
|---|---|---|
| #3 Rebar | 3/8 inch (0.375 in) | Standard residential flatwork, lighter patios, and walkways |
| #4 Rebar | 1/2 inch (0.500 in) | Concrete driveways, heavier slabs, and structural elements |
While these sizes serve as standard reference points for residential construction, bar selection depends entirely on project engineering requirements, slab thickness, and load calculations.
How Far Apart Should Rebar Be in Concrete?
Reinforcement spacing describes the distance from the center of one parallel bar to the center of the next (referred to as "on center" or O.C.). In residential construction, rebar spacing of 12 inches to 18 inches on center is frequently encountered.
Closer spacing creates a denser reinforcement grid, which increases load distribution capacity. However, 12-inch or 18-inch spacing is not a universal code requirement; it must align with engineered design specifications.
| Example Grid Specification | Description |
|---|---|
| #3 rebar @ 12" O.C. | 3/8-inch reinforcing bar placed with 12-inch center-to-center spacing in both directions |
| #3 rebar @ 18" O.C. | 3/8-inch reinforcing bar placed with 18-inch center-to-center spacing |
| #4 rebar @ 12" O.C. | 1/2-inch reinforcing bar placed with 12-inch center-to-center spacing for heavy loads |
| #4 rebar @ 18" O.C. | 1/2-inch reinforcing bar placed with 18-inch center-to-center spacing |
How Is Wire Mesh Used in Concrete?
Welded wire reinforcement is manufactured in various gauges (wire diameters) and grid configurations (such as 6x6-W1.4/W1.4). Heavier wire gauges offer superior crack-control performance compared to light-gauge alternatives.
Proper placement is essential. Pulling mesh up with a hook while wet concrete is being poured is an outdated practice that frequently leaves the mesh resting near the bottom or top surface rather than securely supported in the optimal zone. Wire mesh requires proper chairs or supports to remain stable throughout the pour.
Where Should Rebar Be Placed in a Concrete Slab?
Reinforcing steel must be positioned correctly within the cross-section of the concrete slab to function properly. Leaving rebar flat on the subgrade provides virtually no structural reinforcement because tensile forces concentrate within the middle or upper portions of the slab.
Contractors use specialized plastic chairs, concrete dobies, or wire supports to elevate the rebar grid off the subgrade. Maintaining this precise vertical position prevents the steel from shifting or sinking under the weight and impact of wet concrete placement.
| Feature | Welded Wire Mesh | Reinforcing Rebar |
|---|---|---|
| Form | Welded wire grid sheets or rolls | Individual steel bars or assembled grids |
| Common Use | Crack control / lighter residential slabs | Structural reinforcement / heavy loads & driveways |
| Installation | Rolled out or laid in sheets | Tied together to form a stable grid |
| Strength Options | Varies by wire gauge and spacing | Varies by bar size (#3, #4, etc.) and spacing |
| Placement | Must be elevated on proper supports | Must be supported on chairs or dobies |
| Universal Fit? | No (depends on project requirements) | No (depends on structural demands) |
What Makes Concrete Reinforcement Effective?
Proper Selection
The reinforcement type must match the specific structural and load demands of the flatwork project.
Correct Spacing
The reinforcement grid must adhere to specified spacing intervals to ensure uniform stress distribution.
Proper Placement
Reinforcement must remain precisely in its intended vertical position throughout the concrete pour.
Stable Support
Chairs or bolsters prevent steel from sinking onto the subgrade during placement and vibration.
Example: Reinforcing a Residential Concrete Patio
Consider a homeowner planning a standard 400-square-foot residential concrete patio. Deciding between welded wire mesh and rebar cannot be determined by surface area alone.
Factors such as intended patio use, expected furniture or hot tub loads, expansive clay soils, and local climate exposure guide the decision. A light-duty patio on stable soil may utilize welded wire reinforcement when specified, while a patio engineered to support a heavy spa or built-in masonry kitchen may call for a robust #3 rebar grid. Project engineering requirements always take precedence over general rules of thumb.
Does Rebar or Wire Mesh Prevent Concrete Cracks?
A common misconception is that installing rebar or wire mesh eliminates concrete cracking entirely. Concrete naturally undergoes drying shrinkage and volumetric changes as it cures and responds to temperature shifts.
Reinforcement does not stop cracks from initiating; rather, it controls crack width by holding fractured sections tightly together. Additional factors such as control joint placement, water-cement ratios, curing practices, and subgrade preparation play vital roles in managing concrete cracking.
Rebar or Wire Mesh: Which Should I Choose?
Wire Mesh May Be Considered When:
- The application is light-duty (walkways, basic patios)
- Basic crack-control reinforcement is appropriate
- Project specifications call for welded wire reinforcement
- Local building practices and site conditions permit it
Rebar May Be Considered When:
- Anticipated vehicle loads are higher (driveways, parking)
- The slab has demanding structural requirements
- Challenging soil or frost conditions are present
- Engineering drawings or local codes specify a rebar grid
Final Note: When project blueprints, structural calculations, or local building codes mandate specific reinforcement sizes and spacing, always adhere to those exact specifications.
Need to calculate your concrete volume and material requirements first?
← Jump to CalculatorWhen planning your sub-base preparation and gravel requirements for slabs, patios, or driveways, our Concrete Calculator provides essential baseline estimates, but sub-grade stability can vary widely depending on local soil types and moisture levels. Always ensure proper excavation depth and thorough mechanical compaction are verified to prevent future settling or cracking.
Common Concrete Pouring Mistakes to Avoid
Even a correctly calculated concrete quantity can produce disappointing results if the material is placed, finished, cured, or jointed incorrectly. Avoiding common pitfalls ensures your concrete slab, patio, or driveway achieves maximum strength and long-term durability.
The Most Common Concrete Pouring Mistakes
Adding Too Much Water
Extra water can make concrete easier to work with temporarily but can reduce its potential strength and durability.
Poor Sub-Base Preparation
Unstable or poorly compacted support can contribute to settlement and cracking.
Pouring in Unsuitable Weather
Extreme heat, wind, cold, or rapidly changing conditions can complicate placement and curing.
Finishing Too Early
Working the surface before bleed water has properly dissipated can weaken or damage the surface.
Finishing Too Late
Waiting too long can make proper finishing difficult and may result in an uneven surface.
Improper Curing
Allowing concrete to lose moisture too quickly can interfere with proper strength development and durability.
Cutting Control Joints Too Late
Delayed jointing can increase the chance that shrinkage cracks appear where they were not intended.
Overloading Too Soon
Using a new slab before it has developed adequate strength can damage the concrete.
1. Adding Too Much Water to the Concrete
During concrete pouring tips for homeowners, one of the most frequent temptations is adding extra water at the jobsite. Workers or homeowners often add water because the concrete appears too stiff, makes spreading difficult, dries out quickly in hot weather, or experiences delays during placement.
However, adding excessive water to a concrete mix can increase the water-cement ratio and reduce the concrete's potential strength and durability after hardening. Concrete's specified PSI is based on an intended mix design and precise water-cement proportions. Excess water can reduce the concrete's potential strength and durability.
Follow the ready-mix supplier's instructions and approved mix specifications. If workability needs adjustment, use an appropriate method rather than casually adding water.
2. Pouring Concrete on Poorly Prepared Ground
The foundation beneath your flatwork is just as important as the concrete itself. Pouring concrete over loose soil, uncompacted material, organic matter, or poorly drained subgrade creates severe vulnerabilities.
Inadequate support contributes directly to settlement, cracking, uneven slabs, and localized movement over time. For a detailed explanation of gravel depth and sub-base preparation, see our Sub-Base Preparation & Gravel Requirements guide and explore our Gravel Base Calculator.
Excavate to stable native soil, install approved aggregate, and thoroughly compact the base before placement.
3. Pouring Concrete in Difficult Weather Conditions
Weather plays a major role in successful concrete placement and finishing. Ignoring environmental factors can lead to unexpected complications:
- Hot, Dry, or Windy Conditions: Can accelerate moisture loss and make finishing and curing much more difficult.
- Cold Conditions: Can slow setting and strength development significantly.
- Rain: Can interfere with the surface integrity and finishing if significant water reaches fresh concrete.
Challenging weather does not automatically make a concrete pour impossible, but it requires advance planning and appropriate procedural adjustments. Always follow concrete supplier recommendations and project specifications.
4. Finishing Concrete Before the Timing Is Right
Finishing too early is a frequent culprit behind concrete finishing mistakes. When concrete is freshly placed, moisture known as bleed water rises to the top surface.
Attempting to trowel or work the surface before bleed water has properly dissipated works water back into the slab, creating a weakened surface layer that is prone to dusting, scaling, and flaking.
Wait patiently for bleed water to evaporate completely and for the concrete to firm up before initiating finishing operations.
5. Waiting Too Long to Finish the Concrete
Conversely, waiting too long creates its own set of problems. Fresh concrete has a limited working window. If finishing begins too late, the surface becomes excessively stiff and difficult to work, desired textures are hard to achieve, edges become difficult to shape, and the finished appearance suffers.
Correct finishing timing depends on variables such as the concrete mix, temperature, wind, humidity, slab size, and placement conditions.
6. Not Curing Concrete Properly
A widespread misconception is that curing means waiting for concrete to dry. In reality, concrete gains strength through hydration—a chemical reaction between cement and water that requires appropriate moisture and temperature conditions.
Allowing concrete to lose moisture too quickly through evaporation interferes with proper strength development and durability. Curing methods may include maintaining moisture with continuous soaking, using curing compounds, or applying moisture-retaining coverings.
Common Reference: Many conventional concrete applications are commonly cured for around 7 days, but actual curing requirements depend on the concrete mix, weather, project specifications, and desired performance. Curing conditions matter particularly during the early period after placement.
7. Cutting Control Joints Too Early or Too Late
Control joints are intentionally created weakened planes designed to encourage shrinkage cracking to occur at planned locations rather than randomly across the slab. However, concrete joint timing is critical:
- Too Early: The concrete is still too soft, causing raveling, aggregate dislodgement, or damaged joint edges.
- Too Late: Uncontrolled shrinkage cracking may begin before the planned joint is cut.
Saw-cut timing depends on the mix, temperature, weather, slab conditions, saw type, finishing process, and when the concrete is strong enough to cut cleanly without raveling.
8. Poorly Planned or Missing Control Joints
Simply having control joints is not enough; their location, spacing, layout, depth, and execution dictate how effectively they control concrete slab cracking. Poor joint spacing or irregular panel shapes can lead to random cracks forming outside the designated joints. Ensure joints divide slabs into nearly square panels with appropriate depth ratios.
9. Putting Heavy Loads on Fresh Concrete Too Soon
Rushing to use a new slab can cause permanent damage. Whether dealing with foot traffic, vehicles, heavy equipment, or furniture, loading concrete before it has developed adequate strength can crack or crush the surface.
While the standard 28-day benchmark is commonly used as a reference age for specified compressive strength for many mixes, it is not a rigid rule that concrete is unsafe for light use beforehand. The appropriate waiting period depends on the mix, curing conditions, and intended load. For details, see our Concrete Calculator: Slabs, Patios & Driveways.
10. Rushing the Concrete Pour
Rushing leads to inconsistent placement, poor finishing, missed joints, inadequate curing preparation, and insufficient attention to edges. Successful concrete pours require preparation: have the site prepped, tools ready, labor available, reinforcement properly placed in accordance with our Reinforcement Guide: Rebar vs. Wire Mesh, and a curing plan established before the truck arrives.
Before the Concrete Truck Arrives: Quick Checklist
Review this checklist to ensure your site is fully prepared for a successful pour.
Avoid the Mistake → Do This Instead
Quick reference guide matching common pouring errors with better practices.
| Common Mistake | Better Approach |
|---|---|
| Adding excessive water | Follow the specified mix and supplier guidance |
| Poor ground preparation | Establish stable, properly prepared support |
| Pouring in difficult weather without planning | Adjust procedures and follow project recommendations |
| Finishing too early | Wait for the appropriate finishing stage |
| Finishing too late | Plan labor and equipment for the available working window |
| Poor curing | Start the appropriate curing process promptly |
| Late control-joint cutting | Plan jointing and monitor concrete setting |
| Heavy use too soon | Allow appropriate strength development before loading |
Example: A Patio That Looks Fine at First—Then Cracks
Consider a homeowner planning a backyard concrete patio. They accurately calculate the required volume, prepare the forms, and complete the pour. However, because the mix feels stiff on a warm day, they add extra garden-hose water to ease placement. They also fail to apply a curing compound and delay control-joint cutting until the following morning.
While the installation looked pristine right after finishing, these conditions can increase the risk of surface scaling, drying shrinkage cracking, and random fracturing within weeks. This scenario reinforces an essential lesson: a correct concrete quantity does not guarantee a successful pour.
The Biggest Mistake? Rushing the Process.
Successful concrete work depends on meticulous preparation, careful timing, proper placement, skilled finishing, accurate jointing, and diligent curing—not simply pouring the correct number of cubic yards. Take your time at every step to ensure lasting results.
Concrete Pouring Mistakes Are Often Preventable
Homeowners can dramatically reduce common problems by preparing the site correctly, avoiding unnecessary water, planning for weather variables, finishing at the right stage, curing properly, scheduling control joints, and allowing appropriate strength development before heavy loading.
Professional Guidance: For structural, heavily loaded, unusual, or code-sensitive projects, always follow project-specific engineering specifications and consult a qualified concrete professional when appropriate.
Using the Concrete Calculator makes initial budgeting and material planning straightforward, but actual site conditions, delivery logistics, and waste factors can vary from project to project. Always consult with industry professionals and cross-reference your numbers to ensure structural integrity and successful results.
Frequently Asked Questions
Planning a concrete or masonry project involves precise measurements and strict curing guidelines. Use this comprehensive FAQ guide alongside our Concrete and Materials Calculators to ensure structural durability, accurate material ordering, and a flawless finish for your home improvement projects.
No matching questions found
Try searching using different keywords like "drive", "bags", "cubic yard", or "cure".
You should wait at least 7 to 14 days before driving standard passenger vehicles on a new concrete driveway. While concrete can typically support foot traffic within 24 to 48 hours, it takes roughly 28 days to reach nearly 99% of its total compressive strength.
Concrete curing is a chemical hydration process rather than a drying process. It achieves strength according to standard industry benchmarks:
- 24 Hours: Safe for light foot traffic and removing forms carefully.
- 7 Days: Reaches approximately 70% of its designed compressive strength.
- 28 Days: Reaches 99% (or full) structural compressive strength.
You will need exactly 45 bags of 80-pound concrete mix to yield one cubic yard (27 cubic feet) of mixed concrete. If you are using smaller 60-pound bags, you will need 60 bags to equal one cubic yard.
It takes 60 bags of 60-pound concrete mix to make one cubic yard of mixed material. Because 60lb bags are lighter and easier to handle than 80lb bags, they are popular for DIY backyard projects, though they require handling a higher total quantity of individual packages.
Coverage depends directly on the thickness of your slab. One 80lb bag yields roughly 0.6 cubic feet of mixed concrete. Based on standard depths:
- At 2 inches thickness: Covers approx. 3.6 square feet
- At 4 inches thickness: Covers approx. 1.8 square feet
- At 6 inches thickness: Covers approx. 1.2 square feet
For standard residential driveways, a minimum thickness of 4 inches is recommended for passenger vehicles. If you frequently park heavy trucks, RVs, or delivery vehicles on the driveway, pouring a 5 to 6-inch slab reinforced with rebar is highly advised. Backyard walkways and patios only require a standard 4-inch depth.
Yes. Installing a 4-inch compacted layer of crushed stone or gravel (such as crushed item-4) under your concrete slab is critical. It provides uniform structural support, improves drainage to prevent water pooling under the concrete, and stops expansive soils from cracking the slab during freeze-thaw cycles.
You can typically walk on new concrete after 24 to 48 hours, depending on ambient weather conditions, humidity, and temperature. Press your thumb gently against an inconspicuous edge; if it leaves an indentation, it is still too soft and foot traffic should be delayed.
Concrete naturally shrinks as it cures and expands/contracts with temperature shifts. Control joints (grooves cut or tooled into the surface roughly 1/4 the depth of the slab) create predetermined weak lines. This forces the concrete to crack cleanly inside the joint rather than forming unsightly, random jagged cracks across the surface.
There are exactly 27 cubic feet in one cubic yard of concrete ($3 \text{ ft} \times 3 \text{ ft} \times 3 \text{ ft} = 27 \text{ cu ft}$). To calculate cubic yards for your project, multiply your slab's length, width, and depth (in feet) to find total cubic feet, then divide that final number by 27.
For standard flatwork like sidewalks, patios, and driveways, wooden forms can typically be removed after 24 to 48 hours. Ensure you strip the boards carefully using a pry bar without chipping or gouging the soft concrete edges, especially around corners.
If concrete loses its moisture too rapidly due to high heat, wind, or low humidity, premature drying halts the chemical hydration process. This results in plastic shrinkage cracks, chalky dust surfaces (dusting), and a severe reduction in overall structural strength.
While welded wire mesh helps control minor surface cracking in thin garden slabs, steel rebar grid networks provide vastly superior structural load-bearing strength. For driveways and parking pads carrying vehicle weight, #3 or #4 steel rebar spaced 12 to 18 inches apart is the gold standard.
You should generally wait 30 to 60 days before applying a decorative or protective sealer to new concrete. Sealing too early can trap residual moisture inside the slab, causing the sealer to bubble, peel, or turn milky white under sun exposure.
Standard wet mixed concrete weighs approximately 4,000 pounds (or 2 tons) per cubic yard, which averages out to about 150 pounds per cubic foot. Accounting for this massive weight is vital when calculating structural sub-grade support and equipment load limits.
Yes, but special cold-weather precautions are mandatory. If fresh concrete freezes before it reaches a compressive strength of at least 500 psi (typically within the first 48 hours), its internal water expands into ice, permanently ruining the crystalline bond and destroying up to 50% of its strength.
Ready to Calculate Your Concrete Bags?
Plug your exact dimensions into our interactive Concrete Calculator to instantly determine precise cubic yards, yards in yards, and total bag requirements.
Our Trusted Sources
Our concrete volume formulas, slab load calculations, and installation standards are built upon verified guidelines from leading concrete industry associations, engineering institutes, and government bodies.
Accurate concrete volume calculations and structural longevity estimates rely heavily on precise mathematical formulas, proper waste allowances, and rigorous sub-base guidelines. By aligning our calculator's algorithms with American Concrete Institute specifications and NRMCA recommendations, we ensure that every yardage estimate and material breakdown matches real-world construction standards.
Related Calculators
Planning a concrete project often involves more than calculating concrete volume. These related Calculante calculators can help you estimate costs and materials for connected home improvement and construction projects.