
Tile Calculator
Calculate how much tile you need for floors, bathrooms, showers, and backsplashes. Estimate tile square footage, waste, tiles, boxes, grout, thinset, and project costs with our easy-to-use Tile Calculator.
Calculate your tile quantities, boxes, grout, thinset mortar, backer board, and total project costs. Add multiple areas and adjust advanced installation options for precision planning.
Material costs are only half the project. Layout, subfloor leveling, and waterproofing require professional execution.
Tile Calculator: How Many Tiles Do I Need?
To determine how many tiles you need, measure your room's length and width to calculate total square footage, subtract major openings like doors or windows, divide by individual tile coverage, and add a 10% waste allowance. Finally, divide your total purchase square footage by box coverage and round up to the nearest whole box.
Planning a tiling project begins with understanding your exact surface dimensions and material needs. Whether you are installing a new floor, a bathroom wall, a shower enclosure, or a kitchen backsplash, getting the calculation right prevents costly shortages or excessive leftover materials. A reliable Tile Calculator uses your measurements and tile specifications to generate precise purchasing quantities instantly.
How to Calculate How Many Tiles You Need
- Measure the surface area: Multiply the length by the width of each space you plan to tile.
- Account for openings: Subtract the square footage of permanent openings such as doors or large windows.
- Determine tile coverage: Calculate the area covered by a single tile using its length and width.
- Calculate base tile quantity: Divide your net surface area by individual tile coverage.
- Add a waste allowance: Factor in an extra percentage (typically 10%) for cuts, breakage, and layout adjustments.
- Convert to boxes: Divide your total required purchase area by the coverage amount listed on your tile packaging, always rounding up.
How to Calculate Tile Square Footage
Calculating square footage is the foundational step for any installation. For rectangular floors or walls, multiply the length and width measured in feet.
When calculating individual tile coverage, tile dimensions are usually measured in inches. Because 1 square foot equals 144 square inches, you convert tile dimensions into square feet using this formula:
How Many Tiles Do I Need for a Room?
Consider a standard rectangular room measuring 10 feet by 12 feet. Multiplying these dimensions gives a gross floor area of 120 square feet. If you are installing standard 12-inch by 12-inch tiles (which each cover exactly 1 square foot), you would need 120 tiles for perfect, zero-waste coverage. Because cutting and fitting require extra material, adding a 10% waste allowance brings your total purchase requirement to 132 square feet, or 132 individual tiles.
If you switch to larger 12-inch by 24-inch tiles (covering 2 square feet each), the total surface area remains 120 square feet, but you would only need 60 base tiles (or 66 tiles including waste). Larger formats reduce grout lines and individual tile counts while maintaining the exact same underlying square footage.
How Much Extra Tile Should I Buy?
Extra tile is essential to cover cuts around corners, perimeter trim adjustments, minor installation breakage, and future repairs. While a standard 10% waste allowance suits most straightforward grid layouts, complex patterns like herringbone or diagonal layouts often require 15% or more additional material due to increased cutting angles.
How Many Boxes of Tile Do I Need?
Tiles are almost universally sold in manufacturer boxes or cartons rather than individually. To determine your carton requirement, divide your total purchase area (including waste) by the coverage capacity listed on the box.
Always round up to the next whole box. If your calculation yields 11.2 boxes, you must purchase 12 boxes. Buying partial boxes is rarely an option at retail, and having a few leftover tiles secured from the same production lot is invaluable for long-term home maintenance.
Does the Calculation Work for Walls, Showers, and Backsplashes?
Yes. The fundamental math remains identical across different surfaces, though the measuring technique changes slightly:
Shower Walls & Enclosures
Measuring vertical height and perimeter wall lengths allows a Shower Tile Calculator approach to accurately estimate vertical tile and waterproofing membrane requirements.
Kitchen Backsplashes
Measuring the span between countertops and upper cabinets—while deducting cabinetry or outlet spaces—applies the same area formula used by a Tile Backsplash Calculator.
How Tile Quantity Connects to Project Cost
Determining your exact tile purchase square footage is the first step toward budgeting your entire project. Multiplying your total required square footage by the tile's retail price per square foot establishes your baseline material expense. From there, a comprehensive Tile Cost Calculator can incorporate setting materials like thinset mortar, grout, backer board, and professional labor rates to provide a complete project financial overview.
How to Calculate Tile Square Footage
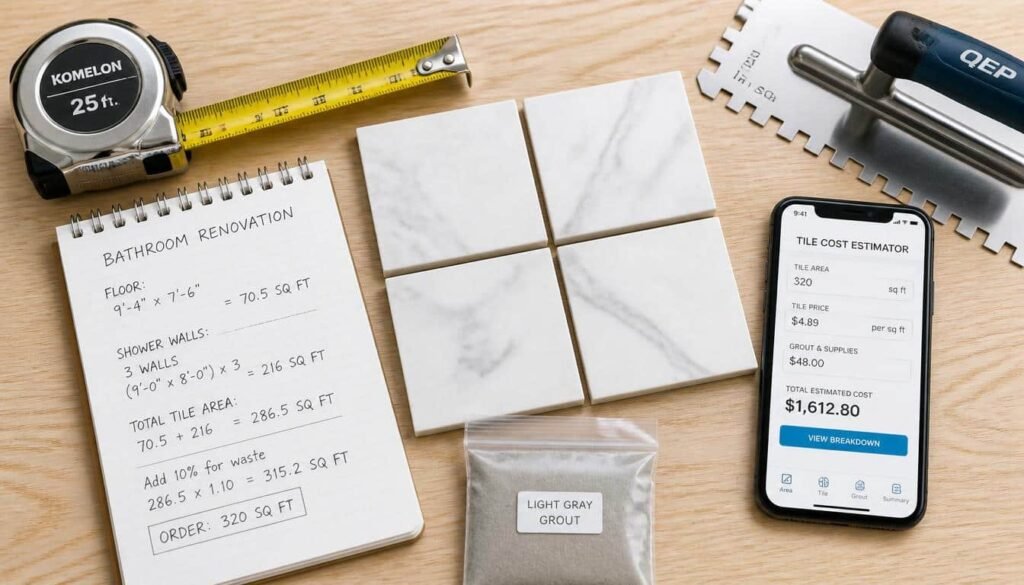
To calculate square footage for tile, measure the length and width of the surface area in feet, multiply them together to get total square feet, combine separate room or wall areas together, and subtract significant permanent openings such as doors or large windows when appropriate.
Calculating accurate tile square footage is the foundational step for planning any successful tiling project. Whether you are estimating materials for a floor, a bathroom wall, or a kitchen counter, knowing the exact surface area tells you how much space needs coverage before you factor in waste or purchase individual boxes of tile.
What Is Tile Square Footage?
Square footage measures the two-dimensional surface area of a space in square feet. Crucially, the surface area of a room or wall remains entirely independent of the tile dimensions you choose. A 120-square-foot floor contains the exact same surface area whether you plan to install small 4x4 inch tiles or large 24x24 inch formats. The surface square footage dictates how much space must be covered, while individual tile sizes dictate how many physical pieces and cut lines will be required.
How to Calculate Square Feet for a Floor
For standard rectangular or square flooring areas, measuring is straightforward. Measure the length and width of the room in feet with a tape measure, then multiply the two numbers together.
For example, if a room is 12 feet long and 10 feet wide:
The base floor area equals 120 square feet. Material waste percentages are always added after this base surface measurement is established.
How to Calculate Wall Square Footage
Vertical surfaces follow the exact same area principle, substituting wall length and wall height for room dimensions.
For example, a single wall measuring 8 feet wide and 9 feet high contains 72 square feet of surface area. When tiling a room with multiple walls, you calculate each wall section separately and add the individual totals together to find the combined gross wall surface.
How to Subtract Doors and Windows
Large openings reduce the amount of tile required for vertical surfaces. To account for this, calculate the square footage of doors or windows and subtract them from your gross wall area.
For instance, if your gross wall area is 72 square feet and contains a standard 3x7 foot door (21 square feet):
While homeowners do not always need to subtract every tiny architectural break, accounting for significant openings ensures more accurate material planning.
How to Calculate Multiple or Irregular Areas
Real-world homes rarely consist of single, perfect rectangles. L-shaped rooms, hallways, or spaces with alcoves can easily be measured by dividing the irregular floor plan into smaller, manageable rectangular sections.
Calculate the square footage of each individual rectangular zone separately, then sum the totals to determine the complete gross surface area.
| Surface Section | Dimensions | Calculated Area |
|---|---|---|
| Main Floor Area | 12 ft × 10 ft | 120 sq. ft. |
| Hallway Extension | 4 ft × 5 ft | 20 sq. ft. |
| Combined Gross Area | Total Sum | 140 sq. ft. |
Does Tile Size Change the Square Footage?
No. Selecting different tile sizes—such as 12x12 inches, 12x24 inches, or larger formats—does not alter the underlying square footage of your room. However, tile dimensions dictate how individual pieces fit into that space and how many square inches comprise a single tile. Because 1 square foot equals 144 square inches, you can determine individual tile coverage by multiplying tile length and width in inches, then dividing by 144.
How Square Footage Applies to Showers and Backsplashes
The core square-footage methodology remains identical across specialty applications:
Shower Walls
A Shower Tile Calculator relies directly on individual wall height and width measurements combined to find the total vertical enclosure area.
Kitchen Backsplashes
A Tile Backsplash Calculator calculates linear run lengths multiplied by height between countertops and upper cabinets.
How Square Footage Affects Tile Cost
Accurate square footage serves as the direct financial multiplier for your project budget. Multiplying your net surface area (plus waste) by retail material costs establishes your baseline expenses. When preparing detailed estimates, a comprehensive Tile Cost Calculator uses this exact square footage to project mortar, grout, underlayment, and labor totals.
Tile Waste Calculator: How Much Extra Tile Should You Buy?
To determine how much extra tile you should buy, apply a waste allowance over your net surface area. Many straightforward installations use around 10% extra as a baseline planning allowance, while complex layouts, irregular room shapes, extensive cutting, or challenging installations often require 15% or more additional material.
Calculating your room or wall dimensions tells you the exact square footage of the space, but purchasing only that exact amount almost always results in running short before the job is finished. Every tiling project requires extra material to account for cutting, fitting, minor breakage, and future home maintenance. Understanding how tile overage works ensures you buy the right quantity from the start.
Why Do You Need Extra Tile?
Even the most precise measurements cannot avoid the physical realities of installation. Extra tile is necessary for several key reasons:
Cuts & Perimeter Fitting
Tiles along walls, corners, doorframes, and fixtures must be cut to fit, which frequently leaves behind unusable scraps.
Breakage & Future Repairs
Accidental chipping during cutting, handling, or transport is common. Keeping a few spare tiles also safeguards against future damage.
How Much Tile Waste Should You Allow?
While no single percentage fits every home, standard planning ranges provide a reliable starting point based on project complexity. Straight layouts with minimal cuts often use around 5% extra. Straightforward rectangular floors or walls typically use around 10% extra. Complex patterns, diagonal installations, herringbone layouts, or spaces with many obstacles frequently call for 15% or more additional material.
| Project Situation | Example Planning Allowance |
|---|---|
| Simple straight layout with minimal cuts | Around 5% |
| Typical straightforward installation | Around 10% |
| Complex layout, diagonal pattern, or many cuts | Around 15% or more |
How to Calculate Tile Waste
Applying an overage percentage is straightforward once your net tile area is established. Multiply your base square footage by 1 plus the decimal form of your chosen percentage.
For example, if your room requires 100 square feet of base tile and you apply a 10% (0.10) waste allowance:
When using a standard Calculante Tile Calculator, this waste percentage is applied exactly once to avoid double-counting.
Practical Calculation Examples
Reviewing standard scenarios helps clarify how overage scales with different room sizes and waste percentages:
- Simple Room: 120 sq. ft. base area at 10% waste requires 132 sq. ft. to purchase.
- Straight Layout: 200 sq. ft. base area at 5% waste requires 210 sq. ft. to purchase.
- Complex Pattern: 200 sq. ft. base area at 15% waste requires 230 sq. ft. to purchase.
Do Tile Layout Patterns Affect Waste?
Yes. The installation pattern significantly influences how many pieces must be cut. A standard grid alignment allows efficient edge fitting. In contrast, diagonal arrangements or herringbone patterns require frequent angled cuts at every perimeter wall, generating more offcuts and justifying a higher overage allowance.
Do Showers and Backsplashes Need Extra Tile?
Vertical and compact surfaces often demand careful planning. A Shower Tile Calculator must account for extra cuts around niches, benches, and plumbing valves. Similarly, a Tile Backsplash Calculator factors in electrical outlets, switches, and countertop returns, which naturally generate cutting scrap despite a small overall footprint.
How Tile Waste Affects Cost
Purchasing extra material increases your upfront expenses, but buying enough tile is far more cost-effective than halting a project mid-installation to reorder. If tile retails at $4 per square foot, a 100 square foot base area costs $400 in materials, while adding 10% waste brings the material total to $440. Incorporating this total purchase area into a Tile Cost Calculator ensures your overall project budget remains accurate and realistic.
How Many Tiles Come in a Box?
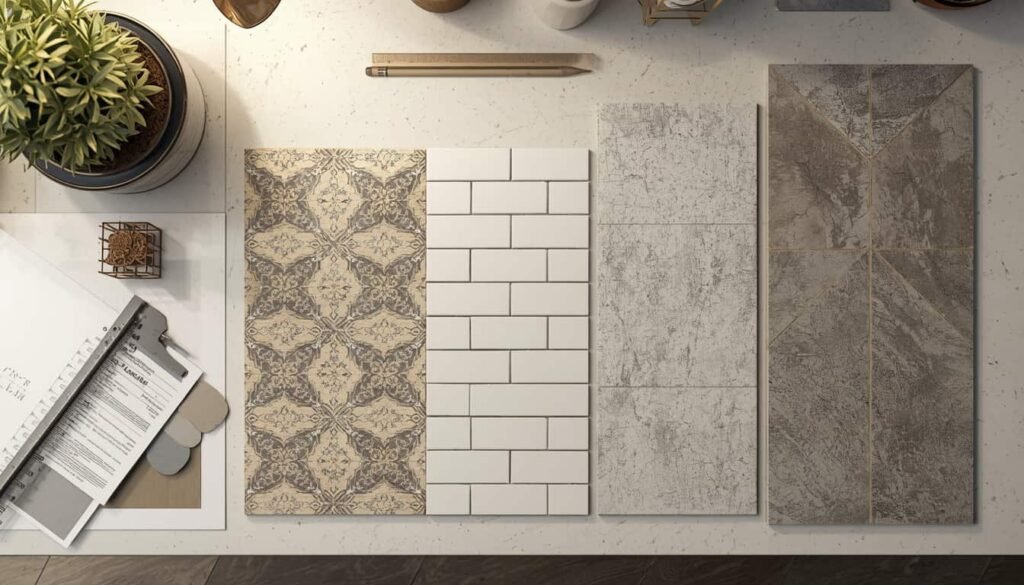
There is no universal number of tiles in a box because packaging depends on the tile's size, shape, thickness, manufacturer, and carton weight limits. For project planning and shopping, the square-foot coverage printed directly on the package label is usually the most important figure to use.
When planning a home improvement project using a reliable Tile Calculator, understanding how manufacturers package their products is essential. Tiles are almost universally sold in boxes or cartons rather than exact individual piece counts. Knowing how to interpret box coverage prevents under-ordering and keeps material estimates accurate.
Why Isn't There a Standard Number of Tiles Per Box?
Tile packaging varies widely across the industry. A carton of standard 12 × 12-inch tiles contains a different piece count than a box of larger 12 × 24-inch or 24 × 24-inch formats. Furthermore, different manufacturers package identical nominal sizes with varying quantities based on carton weight limits, tile thickness, and material composition. Always review the specific product label for accurate packaging details.
Tiles Per Box vs. Square-Foot Coverage
It helps to distinguish between individual piece counts and area coverage. While knowing that a box contains 10 or 12 individual tiles can be useful for handling layouts, the square-foot coverage per box is the primary metric required to determine how many boxes to purchase.
When calculating box quantities, you must always round the final result up to the next whole box. For example, if your total purchase requirement is 145 square feet and each box covers 10 square feet (14.5 boxes), you must purchase 15 boxes.
How Tile Size Affects Coverage Examples
Mathematically, larger tile dimensions increase the surface area covered by a single piece while altering the number of tiles needed to reach box coverage limits. The following mathematical examples illustrate individual tile coverage:
| Tile Size | Mathematical Area Per Tile |
|---|---|
| 12 × 12 in | 1 sq. ft. |
| 12 × 24 in | 2 sq. ft. |
| 24 × 24 in | 4 sq. ft. |
What Information Should You Check on the Tile Box?
Manufacturer packaging includes essential product data printed on the carton label. Homeowners should verify pieces per box, square feet per carton, tile dimensions, model numbers, and production lot or batch numbers. Matching batch numbers ensures consistency in shade and finish across your entire installation.
How Waste Affects the Number of Boxes
The correct purchasing sequence begins by calculating your net surface area, applying your waste allowance once to determine your total purchase area, and then dividing by box coverage before rounding up. Maintaining this proper order ensures you never double-count waste percentages while still purchasing enough cartons to complete the installation smoothly.
How Many Boxes Do You Need for a Shower or Backsplash?
The box-calculation formula applies equally to compact surfaces. If a shower project requires 65 square feet of tile after accounting for waste, and each box covers 10 square feet, the calculation yields 6.5 boxes, meaning you purchase 7 boxes. Similarly, a backsplash requiring 32 square feet with 10-square-foot boxes rounds up to 4 boxes. A specialized Shower Tile Calculator or Tile Backsplash Calculator can help establish that initial base square footage.
How Box Quantity Affects Tile Cost
Determining your exact box count directly establishes your material budget. If your project requires 11 boxes at $40 per box, your baseline tile material cost is $440. Integrating these carton quantities into a comprehensive Tile Cost Calculator helps map out complete project expenses including setting materials and labor.
Tile Cost Per Square Foot
Tile prices vary significantly depending on material type, quality, size, brand, design, and geographic location, meaning no single price applies universally. The basic material expense formula multiplies your total purchased tile area by the retail price per square foot: Tile Area Purchased × Tile Price Per Square Foot.
Understanding tile pricing and project expenses is essential when planning a renovation. Whether you are budgeting for a bathroom, kitchen, or living area floor, a comprehensive Tile Cost Calculator helps organize material purchases, setting supplies, and professional installation expenses into a clear financial overview.
How to Calculate Tile Cost Per Square Foot
Calculating your baseline material cost is straightforward once you know your required purchase area and retail pricing. You multiply the total square footage of tile you plan to buy (including waste overage) by the cost per square foot.
For example, in a hypothetical scenario where you purchase 120 square feet of tile at an assumed retail price of $4 per square foot:
Note: This figure is a hypothetical example for demonstration purposes and does not represent fixed market rates.
What Affects Tile Cost?
Tile pricing spans a broad spectrum based on several product and project variables:
Material & Quality
Ceramic, porcelain, natural stone, glass, and specialty mosaics vary widely in raw material cost, durability, and manufacturing complexity.
Installation Complexity
Substrate preparation, removal of existing flooring, custom layout patterns, and detailed cutting around obstacles influence overall labor requirements.
Tile Material Cost vs. Total Project Cost
A common mistake is assuming that buying tiles represents the entire project expense. A complete installation also involves setting supplies and specialized labor. A thorough Tile Cost Calculator accounts for multiple distinct cost components rather than tile alone.
How Waste Affects Tile Cost
Because tile projects require extra material to cover cuts and installation fitting, your budget should be calculated using the total purchase area rather than the bare net surface area. If a room requires 100 square feet of net space and you add a 10% waste allowance to reach 110 square feet, your material expense reflects that 110-square-foot total.
What Other Materials Add to the Cost?
Beyond the tiles themselves, several installation supplies contribute to your overall project budget:
- Grout and Thinset Mortar: Essential setting materials required to bond and seal tile assemblies.
- Backer Board or Underlayment: Substrate layers that provide a stable, moisture-resistant foundation where needed.
- Sealer and Trim: Finishing products used to protect porous surfaces and create clean edge transitions.
How Labor Affects Tile Installation Cost
Professional labor often forms a substantial portion of a complete tile project budget. Labor rates vary based on geographic location, contractor experience, surface preparation needs, and layout intricacy. Intricate patterns like herringbone or diagonal designs require more time and precision, which can influence installation labor quotes.
Do Showers and Backsplashes Cost Differently?
Specialty areas involve unique cost factors. A Shower Tile Calculator helps establish quantities for vertical enclosures where waterproofing, niches, and bench assemblies increase labor requirements. Conversely, a Tile Backsplash Calculator evaluates smaller surface areas that, while lower in total material volume, require intricate cutting around electrical outlets and cabinetry.
Example of a Complete Tile Project Cost
The following table illustrates how a hypothetical project estimate can combine material and labor components:
| Cost Component | Hypothetical Example |
|---|---|
| Tile Material | $480 |
| Grout Powder | $60 |
| Thinset Mortar | $80 |
| Installation Labor | $700 |
| Other Materials & Supplies | $100 |
| Estimated Total Project Cost | $1,420 |
Hypothetical example only — actual project costs vary by region, contractor, and material selection.
Floor Tile vs. Wall Tile Calculations
Is calculating floor tile and wall tile the same? While the basic area calculation is similar, floor tile is usually based on floor length and width, whereas wall tile requires wall width and height and frequently demands detailed deductions for doors, windows, niches, or other permanent openings.
Planning a tiling project requires understanding how surface orientation impacts material estimates. Although both applications rely on foundational square-footage principles, structural differences between horizontal flooring and vertical walls change how measurements, openings, cuts, and box quantities are approached. A dependable Tile Calculator helps bridge these differences by adapting to your specific layout.
Is Calculating Floor Tile and Wall Tile the Same?
At their core, both floor and wall calculations determine surface area by multiplying two linear dimensions together. However, structural features set them apart. Floors span continuous horizontal planes with minimal architectural interruptions, while vertical walls intersect with ceilings, corners, doors, windows, and built-in fixtures. These structural distinctions mean wall calculations require a more segmented measurement approach.
How to Calculate Floor Tile
Floor tile planning typically involves treating the room as a horizontal rectangle or breaking irregular rooms into simpler rectangular zones. You measure length and width in feet, multiply them for gross area, and apply your planned waste percentage before converting to boxes.
How to Calculate Wall Tile
Wall tile is calculated wall-by-wall rather than as a single flat plane. You measure the width and height of each individual wall surface, sum the gross areas together, and subtract the square footage of significant openings like doors or windows.
Floor Tile vs. Wall Tile: Key Calculation Differences
| Planning Feature | Floor Tile Calculations | Wall Tile Calculations |
|---|---|---|
| Primary Measurement | Length × Width (horizontal surface) | Width × Height for each individual wall |
| Common Deductions | Rarely needed, except for large permanent built-ins | Doors, windows, niches, and recessed wall cavities |
| Common Challenges | Perimeter cuts, room transitions, level changes | Corners, electrical outlets, plumbing penetrations, niches |
| Typical Applications | Kitchens, bathrooms, entryways, laundry rooms | Bathroom accent walls, shower enclosures, backsplashes |
Example: Calculating Tile for a Floor
Consider a standard rectangular bathroom floor measuring 10 feet by 12 feet.
If you incorporate a standard planning allowance for cutting waste, the final purchase quantity expands slightly. When converting this total into retail cartons, box quantities are always rounded up to ensure you do not run short.
Example: Calculating Tile for a Wall
Now consider a single vertical bathroom wall measuring 8 feet wide and 8 feet high, featuring a standard 3-foot by 7-foot doorway.
This net surface area forms the baseline for your vertical tile layout before cutting and fitting overage is added.
How Doors, Windows, and Openings Affect Wall Tile
Vertical installations interact directly with architectural breaks. While small penetrations like electrical outlets create cutting waste rather than a reduction in material need, large features like full-sized windows or doorways meaningfully decrease the net wall area. Deducting these major openings prevents purchasing unnecessary cartons of tile.
How Tile Size and Layout Affect Floor and Wall Quantities
Changing your tile dimensions—such as swapping 12x12 inch squares for large-format 12x24 inch tiles—does not alter the physical square footage of your floors or walls. However, tile size and pattern choices (like straight grids, running bonds, or diagonal arrangements) influence how many perimeter cuts must be made, which directly impacts installation efficiency.
Floor, Shower, and Backsplash Tile Calculations
Different rooms apply these calculation methods in specialized ways. A Shower Tile Calculator relies heavily on multi-wall vertical measurements to account for shower enclosures, benches, and recessed niches. Similarly, a Tile Backsplash Calculator evaluates compact wall runs between countertops and upper cabinetry.
How Floor and Wall Projects Affect Cost
Even when floors and walls share identical square footage, their total expenses can diverge. Wall projects frequently involve complex cutting around fixtures, specialized substrate preparation, or waterproofing requirements that influence professional labor. A comprehensive Tile Cost Calculator helps reconcile these distinct material and labor variables into a cohesive budget.
Quick Floor vs. Wall Tile Checklist
Floor Planning Checklist
- Measure floor length and width accurately
- Divide irregular floor layouts into rectangles
- Select your tile format and box coverage
- Apply an appropriate waste allowance
- Round final box counts up
Wall Planning Checklist
- Measure each wall surface separately
- Record individual wall heights and widths
- Subtract doors, windows, and major openings
- Account for niches, corners, and trim cuts
- Round final box counts up
How to Calculate Tile for a Bathroom
How do you calculate tile for a bathroom? Measure each tiled surface separately, calculate its square footage, subtract major openings where appropriate, add the planned waste allowance, and then convert the final quantity into boxes using the tile manufacturer's coverage.
Planning a bathroom renovation involves more than just measuring a single floor. Because bathrooms combine horizontal floors with vertical walls, shower enclosures, tub surrounds, and vanity spaces, estimating materials requires breaking the room down into distinct zones. A comprehensive Tile Calculator helps you combine these individual measurements into an organized purchasing plan.
How Much Tile Do I Need for a Bathroom?
Determining total bathroom tile requirements depends on which surfaces you intend to cover. While some renovations focus only on the floor, others incorporate full wall tile, shower surrounds, or vanity backsplashes. Accurately measuring each zone prevents shortages while keeping material waste under control.
Measure Each Bathroom Surface Separately
A bathroom is rarely a uniform box. To avoid calculation errors, measure each surface independently rather than treating the entire space as a single area. Group your measurements by floors, walls, and specialty features before combining them into a final project total.
Bathroom Floor Tile Calculation
Floor calculations follow standard horizontal area rules. Measure the length and width of the bathroom floor in feet, then multiply them together to determine the base square footage.
For example, a bathroom floor measuring 8 feet by 10 feet yields 80 square feet of base area. Factoring in a planning waste allowance increases this figure to establish your baseline purchase target.
Bathroom Wall Tile Calculation
Vertical surfaces in a bathroom are calculated wall-by-wall. Measure the width and height of each wall section individually, calculate their respective square footage, and sum them together to find the gross vertical area.
How to Account for Doors, Windows, and Other Openings
Major architectural breaks reduce the total amount of tile needed. Calculate the area of large openings like doors or windows and subtract them from your gross wall measurements.
For instance, if a wall gross area is 64 square feet and contains a 3-foot by 7-foot doorway (21 square feet), the net wall area equals 43 square feet.
Bathroom Shower and Tub Tile Areas
Enclosures and tub surrounds represent specialized zones within a bathroom. Homeowners utilizing a Shower Tile Calculator can evaluate vertical enclosure surfaces independently, accounting for walls, built-in niches, and benches before incorporating those totals into the broader bathroom project.
Bathroom Tile Example
Consider a complete bathroom project combining multiple tiled surfaces:
| Bathroom Surface | Dimensions / Calculation | Surface Area |
|---|---|---|
| Bathroom Floor | 8 ft × 10 ft | 80 sq. ft. |
| Shower Walls | Multi-wall vertical run | 70 sq. ft. |
| Tub Surround | Alcove enclosure panels | 35 sq. ft. |
| Vanity Backsplash | Countertop linear span | 10 sq. ft. |
| Total Gross Area | Combined Sum | 195 sq. ft. |
Bathroom Tile Waste and Box Rounding
Once your gross bathroom area is established, apply a single waste allowance to account for cuts, fitting around fixtures, and minor breakage. For example, applying a 10% planning allowance to 195 square feet yields 214.5 square feet of total purchase area. Dividing this by a box coverage capacity of 10 square feet per carton results in 21.45 boxes, which rounds up to 22 boxes.
Bathroom Tile Cost Considerations
Material and installation expenses for a bathroom extend beyond tiles alone. A complete budget also encompasses grout, thinset mortar, backer board, waterproofing membranes, and professional labor. Utilizing a Tile Cost Calculator helps organize these components alongside any minor Tile Backsplash Calculator estimates into a comprehensive project financial overview.
Bathroom Tile Measurement Checklist
Surface Measurement Steps
- Measure bathroom floor length and width
- Measure each tiled wall section separately
- Measure shower enclosure and tub surrounds
- Measure vanity backsplash spans if applicable
- Record doors, windows, and major openings
Purchasing & Logistics Steps
- Select your tile dimensions and format
- Check box coverage specifications
- Apply an appropriate waste allowance
- Convert total area into cartons
- Round final box counts up
How to Calculate Tile for a Shower
How do you calculate tile for a shower? Measure the width and height of each tiled shower wall, calculate each wall's area, subtract large openings such as niches when appropriate, add an appropriate waste allowance, and then convert the total into boxes using the tile manufacturer's coverage.
Calculating tile for a shower enclosure requires careful attention to vertical surfaces, corners, and recessed compartments. Because shower spaces involve multiple intersecting walls and built-in fixtures, estimating materials accurately prevents unexpected shortages. A dependable Tile Calculator helps you structure these measurements into a reliable purchasing plan.
How Much Tile Do I Need for a Shower?
Determining the total tile required for a shower enclosure involves measuring each vertical wall separately. Unlike flat, open rooms, showers feature enclosed perimeters, corners, and functional cutouts that require careful planning to ensure you order enough material.
Measure Each Shower Wall Separately
Every shower wall should be measured independently. Standard alcove or custom walk-in showers typically feature a back wall flanked by two side walls. Record the width and height of each individual surface to account for varying dimensions or asymmetrical layouts.
How to Calculate Shower Wall Square Footage
Calculate the gross square footage of each wall by multiplying its width by its height in feet.
For example, if your back shower wall measures 5 feet wide by 7 feet high, and your two side walls each measure 3 feet wide by 7 feet high, you calculate each section individually and combine them to find the gross wall area.
How to Deduct a Shower Niche or Opening
Large openings like recessed shower niches reduce the net tile area required. Calculate the dimensions of the niche opening and subtract it from your gross wall measurements when appropriate.
Keep in mind that while a niche reduces overall surface area, cutting and fitting tile inside recessed box cavities can generate additional scrap material during installation.
Shower Floor vs. Shower Wall Tile
Shower floors and shower walls are calculated separately. While walls use width and height measurements, shower floors use length and width:
Shower floors often utilize smaller mosaic tiles or distinct non-slip formats to accommodate slope and drainage, meaning they must be calculated and ordered independently from the wall tiles.
How Shower Tile Size Affects Quantity
Selecting different tile formats—such as small mosaics, 4x4 inch squares, or large-format 12x24 inch tiles—does not alter the physical square footage of your shower. However, tile size directly impacts the number of individual pieces required and the amount of cutting needed around corners, plumbing valves, and edges.
Shower Tile Waste and Box Coverage
Shower enclosures involve numerous cuts around plumbing penetrations, mixing valves, and edges. Applying an appropriate planning waste allowance ensures you have enough material. Once your total purchase area is established, divide it by the manufacturer's box coverage:
Always round your final box count up to the next whole carton.
Complete Shower Tile Calculation Example
| Shower Component | Dimensions | Calculated Area |
|---|---|---|
| Back Wall | 5 ft wide × 7 ft high | 35 sq. ft. |
| Side Wall 1 | 3 ft wide × 7 ft high | 21 sq. ft. |
| Side Wall 2 | 3 ft wide × 7 ft high | 21 sq. ft. |
| Gross Wall Total | Combined Sum | 77 sq. ft. |
| Niche Deduction | 2 ft wide × 1 ft high | −2 sq. ft. |
| Net Wall Area | Adjusted Total | 75 sq. ft. |
| With 10% Waste | 75 × 1.10 | 82.5 sq. ft. to purchase |
| Boxes (10 sq. ft./box) | 82.5 ÷ 10 = 8.25 | 9 Boxes (Rounded Up) |
Shower Tile Cost Considerations
A complete shower tile budget involves multiple components beyond the tiles themselves. Waterproofing membranes, cement backer boards, thinset mortar, grout, and specialized labor all contribute to total project expenses. Utilizing a Shower Tile Calculator alongside a comprehensive Tile Cost Calculator helps organize these material and installation requirements into a clear budget.
Shower Tile Measurement Checklist
Wall & Surface Steps
- Measure every tiled shower wall separately
- Record each wall's exact width and height
- Measure shower niches or recessed cavities
- Determine if the shower floor is included
- Record different tile formats separately
Purchasing Steps
- Check manufacturer box coverage specs
- Apply an appropriate planning waste allowance
- Calculate total purchase square footage
- Convert area into carton quantities
- Round final box counts up
Tile Layout Patterns and Material Waste
Does tile layout affect how much tile I need? The surface area itself does not change because of the pattern, but different layouts can create different numbers of cuts and leftover pieces. More complex layouts or rooms with many edges may require more extra tile than a simple grid installation.
When planning a home improvement project, homeowners often realize that surface dimensions alone do not tell the whole story. The design pattern you choose for your floors, walls, or compact backsplashes directly dictates how many individual cuts must be made. Understanding this relationship helps you refine your estimates when using a Tile Calculator.
Does Tile Layout Affect How Much Tile I Need?
A fundamental rule of tile estimating is that layout patterns do not change the physical square footage of a room. A 100-square-foot floor remains 100 square feet whether you lay the tiles in a straight grid or a complex diagonal formation. However, patterns change how pieces fit against perimeters and corners, altering the volume of offcuts and practical material waste.
Straight Lay or Grid Pattern
The straight lay, or grid pattern, aligns tiles in straightforward, parallel rows perpendicular to the walls. This structure offers a clean, predictable layout with uniform edge cuts along boundaries. While it is generally straightforward to plan, actual waste still depends on room dimensions and boundary alignments.
Running Bond Pattern
A running bond (or offset) pattern staggers each horizontal or vertical row by a set fraction—commonly fifty percent—resembling traditional brickwork. This shifting alignment alters where perimeter pieces land, modifying edge-cut requirements around room boundaries.
Diagonal Tile Layout
A diagonal layout rotates the tile grid at a forty-five-degree angle relative to the room's primary walls. Because tiles meet the perimeter at an angle, boundary pieces require precise triangular or multi-angled cuts, which can increase cutting labor and offcut waste.
Herringbone Tile Layout
The herringbone pattern arranges rectangular tiles in an interlocking, V-shaped directional sequence. This intricate design requires frequent angled cuts along perimeter walls and corners, creating smaller leftover scraps that are rarely reusable.
Why Tile Cuts Create Waste
The core difference between theoretical square footage and practical purchasing quantity lies in edge cutting. When a tile is sliced to fit a boundary, the remaining offcut is often too small or awkwardly shaped to use elsewhere. Features like corners, columns, plumbing penetrations, and niches amplify this cutting requirement.
Tile Size and Layout Efficiency
Tile dimensions interact directly with both room geometry and layout choice. While large-format tiles reduce grout joint lines, they can produce substantial offcuts when trimmed. Conversely, smaller tiles involve numerous individual pieces, smoothing out transitions in tight spaces. Evaluating these factors helps prevent shortages.
How Layout Affects Tile Ordering
Incorporating layout patterns into your purchasing workflow follows a structured progression:
- Calculate the base surface area of your floors or walls.
- Factor in architectural openings and major room features.
- Assess your chosen layout pattern and anticipated perimeter cutting complexity.
- Select an appropriate waste planning allowance (such as 5%, 10%, or 15% based on complexity).
- Convert total square footage into boxes and round up to the next whole carton.
Layout Examples for Floors, Showers, and Backsplashes
Shower & Backsplash Layouts
A Shower Tile Calculator or a Tile Backsplash Calculator often demands intricate cuts around valves, corners, and electrical boxes, making pattern planning essential.
Floor Layouts
Expansive open floors generally experience fewer perimeter interruptions than compartmentalized wet areas, though diagonal or herringbone installations still require diligent waste allowances.
How to Plan Tile Waste Without Overbuying
Choosing an overage allowance requires balancing project complexity against budget goals. Simple straight layouts with few obstacles often align with lower planning percentages, whereas diagonal or herringbone configurations in segmented spaces justify higher margins. Accurately matching your allowance to your layout ensures your Tile Cost Calculator estimates remain realistic and reliable.
Quick Layout and Waste Checklist
| Planning Step | Key Consideration |
|---|---|
| Measure Surface Area | Calculate accurate length, width, or wall heights. |
| Select Pattern Design | Determine if using straight, running bond, diagonal, or herringbone. |
| Analyze Perimeter Cuts | Identify corners, doorways, and obstacles that increase cutting. |
| Apply Waste Allowance | Choose a realistic percentage based on layout complexity. |
| Verify Box Coverage | Round final carton requirements up to the next whole box. |
How Much Grout and Thinset Do I Need?
How much grout and thinset do I need? Grout quantity depends mainly on tile size, grout-joint width, and joint depth, while thinset quantity depends on tile area, trowel size, substrate, tile type, and manufacturer coverage. Planning estimates can help, but manufacturer instructions should be used for final material requirements.
Calculating your tile layout using a dependable Tile Calculator covers your surface area and waste overage, but a successful installation also requires proper setting and finishing supplies. Understanding how to estimate mortar and grout requirements ensures your project proceeds smoothly from substrate preparation to final cleanup.
How Much Grout Do I Need?
Grout fills the network of joints between installed tiles, sealing gaps and locking individual pieces into a rigid assembly. Unlike tile, which is calculated strictly by surface area, grout consumption is dictated by the density and dimensions of the joint network across your floors or walls.
What Affects Grout Quantity?
Grout requirements vary based on physical tile dimensions and joint configuration:
- Tile Size: Smaller tiles feature more joint lines per square foot, increasing total grout volume. Larger format tiles reduce joint density.
- Joint Width & Depth: Wider and deeper joints require significantly more material than narrow, shallow lines.
- Tile Thickness: Thicker tiles increase the effective depth of the grout joint, raising material consumption.
How to Estimate Grout for a Tile Project
Because grout consumption depends heavily on joint architecture, planning estimates generally evaluate total joint length, width, and depth to calculate approximate volume before converting the result into container weights using product-specific yield data.
Homeowners should always review package instructions and container yields to confirm exact material weight requirements.
How Much Thinset Do I Need?
Thinset mortar is the adhesive compound responsible for bonding tile to your prepared substrate. For general planning and budgeting, a standard default assumption is often used before checking specific product data.
This baseline figure provides a convenient initial estimate, though actual consumption can vary based on application conditions.
What Affects Thinset Coverage?
Thinset mortar coverage depends on several job-specific variables:
- Trowel Size: Larger notches lay down thicker mortar ridges, covering fewer square feet per bag.
- Substrate Flatness: Uneven subfloors or rough walls require more mortar to level and bond tiles correctly.
- Back-Buttering: Applying a thin skim coat to the back of large tiles increases mortar consumption.
How to Estimate Thinset Bags
To convert your tiled area into bag quantities, divide your total square footage by the expected coverage per bag and always round up to the next whole container.
For example, if a project requires thinset for 125 square feet and your planning rate is 50 square feet per bag (125 ÷ 50 = 2.5), you must purchase 3 bags.
Grout and Thinset Comparison
| Installation Material | Primary Function | Key Consumption Factors | Purchase Unit |
|---|---|---|---|
| Grout | Fills joints between installed tiles | Tile size, joint width, joint depth | Container weight / yield varies by product |
| Thinset Mortar | Bonds tile securely to substrate | Tile area, trowel size, substrate flatness | Sold by bag weight (e.g., 50-lb bags) |
Grout and Thinset for Showers and Backsplashes
Specialized wet areas and compact layouts alter material dynamics. A Shower Tile Calculator often involves smaller mosaic formats on shower floors with dense joint networks, increasing relative grout consumption. Conversely, a Tile Backsplash Calculator evaluates smaller overall surface areas that still require precise mortar troweling around numerous electrical and corner cuts.
How Grout and Thinset Affect Tile Project Cost
Setting materials and finishing supplies represent vital components of your overall renovation budget. Integrating mortar, grout, backer boards, and labor estimates into a comprehensive Tile Cost Calculator ensures your financial planning accounts for the complete installation process rather than tile materials alone.
Grout and Thinset Buying Checklist
Thinset Buying Checklist
- Determine total surface area requiring mortar
- Identify recommended trowel size for your tile format
- Check manufacturer coverage specs per bag
- Account for substrate flatness and back-buttering
- Round final bag quantities up
Grout Buying Checklist
- Record tile dimensions and thickness
- Measure planned grout joint width and depth
- Calculate approximate joint volume
- Check manufacturer container yields
- Select appropriate grout formulation and color
Common Tile Installation Mistakes
What are the most common tile installation mistakes? Frequent errors include inaccurate measurements, insufficient waste allowances, incorrect box calculations, poor layout planning, flawed grout or thinset estimates, and failure to account for project-specific conditions, all of which lead to material shortages or unexpected expenses.
Planning a successful tile project requires careful coordination of measurements, layout patterns, material packaging, and setting supplies. Avoiding common miscalculations prevents frustrating project delays, material shortages, and excess spending. Whether you are estimating quantities independently or organizing expenses through a Tile Cost Calculator, awareness of frequent planning pitfalls ensures a smooth renovation.
Common Tile Mistakes to Avoid
1. Measuring Only One Area
Treating an entire room or multi-surface space as a single flat rectangle leads to severe estimating errors. Floors, shower walls, niches, and backsplashes must be evaluated independently.
2. Forgetting Deductions
Failing to subtract doors, windows, cabinets, or large structural openings results in purchasing unnecessary cartons of material.
3. Buying Exact Net Area
Ordering zero extra material guarantees running short due to perimeter cutting, breakage, and pattern fitting.
4. Applying Waste Twice
Accidentally compounding waste percentages across multiple calculation stages inflates material budgets unnecessarily.
5. Not Rounding Boxes Up
Dropping fractional box requirements leaves installations incomplete. Always round carton counts up to the next full box.
6. Ignoring Box Coverage
Relying solely on "tiles per box" rather than manufacturer-stated square-foot coverage specs creates planning discrepancies.
Measurement and Quantity Mistakes
Mathematical oversights during the initial dimension-gathering phase are among the easiest errors to make. Mixing up units, miscalculating floor area, or confusing net and gross surfaces disrupts subsequent purchasing totals.
For example, a hypothetical 10 ft × 12 ft floor equals 120 square feet. Adding a 10% planning allowance yields 132 square feet to purchase. If each box covers 10 square feet:
Poor Layout Planning and Excessive Tile Waste
Layout patterns—such as straight grids, running bonds, diagonals, or herringbone arrangements—do not change a surface's physical square footage, but they profoundly influence cutting requirements. Complex patterns, tight corners, and irregular boundaries generate offcuts that may not be reusable. Matching your waste allowance to your layout complexity prevents both shortages and excessive surplus.
Grout, Thinset, and Other Material Mistakes
Setting supplies cannot be estimated using generic rules of thumb. Grout consumption depends on tile dimensions, joint width, and joint depth, while thinset mortar coverage varies according to trowel size, substrate flatness, and manufacturer guidance.
| Material | Common Mistake | Why It Matters |
|---|---|---|
| Tile | Ordering exact net area without cutting overage | Perimeter cuts and breakage cause immediate shortages |
| Grout | Treating consumption as a fixed universal rate | Joint width, depth, and tile format dictate actual volume |
| Thinset | Assuming uniform coverage across all substrates | Trowel size and subfloor flatness alter mortar requirements |
| Backer Board | Forgetting structural subfloor preparation layers | Inadequate substrates lead to cracked tile and grout failure |
| Sealer & Trim | Omitting edge profiles and surface protection | Exposed tile edges and porous stones remain vulnerable |
Mistakes When Calculating Shower and Backsplash Tile
Compact spaces introduce disproportionate measurement complexities. When utilizing a Shower Tile Calculator, failing to account for multi-wall enclosures, benches, and recessed niches leads to severe material errors. Similarly, ignoring electrical outlets, cabinet transitions, and short wall runs when planning via a Tile Backsplash Calculator causes unnecessary cutting complications.
Tile Cost Mistakes That Can Increase Your Budget
A frequent budgeting error is conflating raw tile material expense with total project cost. Homeowners frequently overlook supporting elements like grout, thinset, backer board, waterproofing membranes, delivery fees, and professional labor. Factoring these variables into a comprehensive Tile Cost Calculator provides a realistic financial scope. Furthermore, retaining a small quantity of surplus tile is recommended for future repairs rather than viewing extra material as wasted expense.
Tile Installation Mistakes Checklist
Planning & Measurement Checklist
- Measure every room and surface separately
- Subtract doors, windows, and major openings
- Choose your tile format and layout pattern
- Apply an appropriate waste allowance
- Check box coverage and round carton counts up
Supplies & Execution Checklist
- Confirm grout joint width and depth specifications
- Calculate thinset requirements using manufacturer data
- Include backer boards, underlayment, and trim
- Account for delivery, removal, and labor expenses
- Keep manufacturer installation instructions handy
The Best Way to Avoid Tile Installation Mistakes
Accurate tile planning requires disciplined measurement rather than guesswork. By evaluating each surface independently, accounting for structural openings, selecting realistic waste margins, and checking manufacturer specifications for both tiles and setting supplies, you establish a reliable foundation. Factoring in complete project costs—including setting materials, substrate preparation, and labor—ensures your renovation proceeds smoothly from start to finish without unexpected interruptions.
Frequently Asked Questions
Planning a tile project requires more than measuring a room. Learn how to calculate tile square footage, account for waste, estimate boxes, grout, and thinset, and understand the factors that affect tile quantity and project cost.
No matching questions found
Try searching for terms like "waste", "boxes", "grout", "shower", "cost", or "square feet".
To calculate how much tile you need, measure each surface, multiply length by width to find square footage, subtract relevant openings, and add an appropriate waste allowance. Then divide the purchase area by the tile box coverage and round up to the next whole box.
- Measure floors, walls, shower areas, or backsplashes separately.
- Subtract doors, windows, niches, or other significant openings when appropriate.
- Add waste for cuts, breakage, and layout requirements.
- Round the final number of boxes up.
Calculate tile square footage by multiplying the length of the surface by its width or height, using the same measurement units. For a rectangular floor, multiply length by width. For a wall, multiply wall length by height. Add separate areas together and subtract appropriate openings.
For example, a 10-foot by 12-foot floor has 120 square feet. If a project includes several surfaces, calculate each one separately before combining the totals.
Many tile projects use an additional 10% as a planning example for cuts and breakage, but the appropriate amount varies by tile size, room shape, layout pattern, installer technique, and project complexity. Straight layouts may be more efficient, while diagonal or intricate patterns can create more offcuts.
For example, 100 square feet with a hypothetical 10% allowance becomes 110 square feet to purchase. Apply the waste allowance once, then use the resulting purchase area to determine boxes.
To calculate tile boxes, divide the total tile area you need to purchase by the square-foot coverage listed on each box, then round up to the next whole box. The number of individual tiles per box varies by tile size, so box coverage is usually the more useful quantity for ordering.
For example, if you need 132 square feet and one box covers 10 square feet, 132 ÷ 10 equals 13.2 boxes, so you would need 14 boxes.
A tile's coverage depends on its length and width. When tile dimensions are measured in inches, multiply length by width and divide by 144 to convert square inches into square feet. For example, a 12-by-12-inch tile covers 1 square foot before accounting for grout joints, cuts, or installation waste.
A 12-by-24-inch tile covers 2 square feet by the same calculation. Actual installed coverage can vary because tiles are cut and spaced with grout joints.
Tile cost per square foot varies widely by tile material, size, quality, style, brand, location, and supplier. The tile price is only one part of the project budget; grout, thinset, backer board, trim, labor, delivery, removal, and waste can also affect total cost.
A Tile Cost Calculator can help separate tile material cost from the estimated complete project cost. For example, if purchased tile costs $4 per square foot and you buy 110 square feet, the hypothetical tile material cost is $440.
Calculate bathroom tile by measuring each tiled surface separately, including the floor, shower walls, tub surround, or vanity backsplash. Calculate the square footage of each area, subtract appropriate openings, combine the areas, and add a suitable waste allowance before determining how many boxes to purchase.
Keeping each surface separate helps prevent double-counting and makes it easier to account for different tile sizes, layouts, or materials used in the same bathroom.
Calculate shower tile by measuring each shower wall separately, multiplying width by height, and adding the wall areas together. Subtract appropriate openings or niches, then add an allowance for cuts and breakage. Shower floors should be measured separately because their dimensions and tile layout may differ from the walls.
A Shower Tile Calculator can help organize multiple wall surfaces and account for different tile dimensions, waste, and box coverage.
Calculate backsplash tile by measuring the length and height of each backsplash section, multiplying them to find square footage, and adding the sections together. Subtract significant openings when appropriate, then add an allowance for cuts and breakage before converting the final area into boxes.
A Tile Backsplash Calculator is especially useful when several wall sections, corners, outlets, cabinets, or appliances create additional cuts and measurements.
Grout quantity depends on tile length and width, grout joint width and depth, tile thickness, total tiled area, and the specific grout product. There is no single accurate pounds-per-square-foot rule for every tile project. Manufacturer coverage information is the best source for final purchasing quantities.
Smaller tiles and wider grout joints generally create more joint area to fill than larger tiles with narrow joints. A grout estimate should therefore use the actual tile and joint dimensions whenever possible.
Thinset quantity depends on the tiled area, trowel size, tile dimensions, substrate flatness, installation method, and manufacturer coverage. A planning estimate can divide the area requiring thinset by the manufacturer's stated coverage per bag and round up, but actual coverage can vary significantly between installations.
For example, if a product is rated to cover 50 square feet per bag and the project requires 125 square feet, 125 ÷ 50 equals 2.5, so the planning quantity would be 3 bags. Always check the product label for actual coverage.
The basic area calculation is the same for floor and wall tile: multiply the relevant length by width or height. However, the quantity you purchase can differ because walls may contain multiple surfaces, openings, niches, corners, or different layouts. Tile suitability and installation requirements also depend on the specific product.
For walls, calculate each wall section separately when dimensions or openings differ. For floors, room shape and floor transitions can affect cuts and waste.
Tile layout does not change the physical square footage of a surface, but it can change how efficiently the purchased tile is used. Straight, running-bond, diagonal, and herringbone patterns can create different numbers of cuts and reusable offcuts, so complex layouts may require more planning and potentially more material.
There is no universal waste percentage for every pattern. Actual material efficiency depends on room dimensions, tile size, pattern, edges, corners, and the installer’s layout plan.
A complete tile project cost can include tile, grout, thinset, backer board or underlayment, sealer, trim, labor, removal, delivery, and other project-specific expenses. The exact list depends on the surface, tile product, existing conditions, installation method, and whether the project is DIY or professionally installed.
- Tile: The primary finish material and usually the largest material cost.
- Setting materials: Grout and thinset or other approved installation products.
- Supporting materials: Backer board, underlayment, trim, or sealer where applicable.
- Labor and services: Installation, removal, delivery, or other project costs.
Common tile installation mistakes include inaccurate measurements, forgetting openings, buying too little tile, applying waste more than once, ignoring box coverage, poor layout planning, and underestimating grout or thinset. Homeowners can reduce problems by measuring carefully, planning cuts, checking product information, and ordering enough matching material.
It is also useful to verify tile lot or batch information when purchasing multiple boxes, because appearance, shade, caliber, or other product characteristics can vary between production runs.
To use a Tile Calculator, enter the dimensions of each tiled area, account for doors or other deductions, choose your tile size, and add a suitable waste allowance. Depending on the calculator, you can also enter box coverage, grout joints, thinset coverage, material prices, labor, and other project costs.
The Calculante Tile Calculator is designed to help estimate tile quantity, boxes, grout, thinset, and project costs from one set of organized inputs.
Our Trusted Sources
Our tile calculations, material guidance, installation considerations, and planning information are informed by recognized tile-industry organizations, installation standards, building-code resources, and professional trade guidance.
Tile projects depend on more than surface area alone. Tile size, layout, waste, grout joints, thinset coverage, substrate conditions, installation method, and project requirements can all affect material quantities and costs. We use multiple independent industry and construction sources to support the educational information behind our estimates. Calculator results are intended for planning purposes and should not be treated as a guaranteed material requirement or contractor quote.
Related Calculators
Explore more Calculante tools to help you plan home improvement projects, estimate material quantities, calculate project costs, and build a more complete budget before work begins.
A remodeling project often involves more than calculating one material quantity. Concrete, fencing, paint, siding, tile, labor, preparation, and finishing materials can all contribute to the final project budget. These related Calculante tools help you estimate individual parts of your project so you can make better-informed planning and purchasing decisions.