
Paint Calculator
Accurately estimate how many gallons of paint you need for walls, ceilings, and rooms. Calculate exact surface areas, factor in doors and windows, account for multiple coats, and avoid costly material shortages with our advanced interactive calculator.
Based on the information you entered, this estimate reflects your paintable area, coats, and coverage rate.
Enter your ZIP code to compare Licensed painting contractors near you.
How Much Paint Do I Need?
Determining how much paint you need depends primarily on your total paintable surface area, any doors and windows being deducted, the number of coats required, manufacturer paint coverage specs, and a small waste allowance. Properly calculating these factors ensures you purchase the right amount of paint for your room without running short.
The Basic Paint Calculation Process
To find out how many gallons of paint are required for walls and ceilings, you first need to determine the total square footage of the surface area and factor in how many coats you plan to apply. The foundational formula is:
Paint Needed = (Paintable Area × Number of Coats) ÷ Paint CoverageBecause minor spills, roller absorption, and touch-ups always consume extra material, professionals typically add a waste percentage to the core calculation:
Paint Needed With Waste = Paint Needed × (1 + Waste Allowance)Always verify the specific coverage rate listed directly on the paint manufacturer's label or technical data sheet to ensure accuracy.
Walls
The wall area for a standard rectangular room can be estimated using the perimeter formula: 2 × (Room Length + Room Width) × Wall Height. Remember to subtract doors, windows, and other unpainted spaces from this gross total.
Ceilings
When painting the overhead surface, a rectangular ceiling can be calculated simply as Room Length × Room Width. Only factor in ceiling square footage if it is actively included in your painting project.
Doors & Windows
Openings reduce your total paintable wall area. Calculate each opening using Width × Height × Quantity. Always calculate differently-sized doors or windows separately rather than assuming uniform dimensions.
Additional Areas
Built-in closets, accent walls, baseboards, crown molding, or trim often require separate calculations when they are part of your interior painting scope, especially if using a different sheen or color.
Why the Number of Coats Matters
One coat requires significantly less paint than two coats. While two coats are standard for most professional and DIY projects to achieve rich, uniform color depth, the ideal number depends on your surface condition, paint product quality, color transition, and manufacturer guidelines.
Additional coats directly multiply your total painted surface area. For example, if your net wall surface is 1,000 square feet and your project requires 2 coats, your calculations must be based on 2,000 square feet of total coat coverage before evaluating paint coverage and waste.
Understanding Paint Coverage
Paint coverage is specified by the manufacturer, but actual performance can vary depending on product type, surface porosity, texture, and application technique. New, unpainted drywall or highly textured surfaces absorb more paint than smooth, previously painted walls.
Example: If a quality paint product covers 350 square feet per gallon, and your project requires 2,000 square feet of total coat coverage, you divide 2,000 by 350 to get approximately 5.71 gallons before factoring in container sizes and waste allowance.
Accounting for Waste Allowance
Even with precise measurements, you will likely need extra paint to account for roller and brush saturation, minor spills, surface texture variations, uneven absorption, and future touch-ups. The Calculante Paint Calculator lets you easily customize your waste allowance percentage based on your specific surface conditions.
Example: How Much Paint for a 12 × 10 Room?
Let's walk through a practical scenario for a standard room:
- Room Dimensions: 12 ft length, 10 ft width, 8 ft wall height
- Openings: One door (3 × 7 ft) and two windows (3 × 4 ft each)
- Application: 2 coats
- Paint Coverage: 350 sq ft per gallon
1. Gross Wall Area: 2 × (12 + 10) × 8 = 352 sq ft
2. Door Deduction: 3 × 7 = 21 sq ft
3. Window Deductions: 2 × (3 × 4) = 24 sq ft
4. Net Wall Area: 352 − 21 − 24 = 307 sq ft
5. Two-Coat Surface Area: 307 × 2 = 614 sq ft
6. Paint Required Before Waste: 614 ÷ 350 = 1.75 gallons
Note: The final purchase quantity depends on available container sizes and your selected waste allowance. This mathematical estimate does not imply you can purchase a fractional 1.75 gallons directly off the shelf.
Paint Quantity Calculation at a Glance
| Calculation | Formula | What It Tells You |
|---|---|---|
| Gross wall area | 2 × (Length + Width) × Height | Total wall surface before openings |
| Opening deductions | Width × Height × Quantity | Unpainted door and window space |
| Net paintable area | Gross Wall Area − Deductions | Actual wall surface to be painted |
| Total coat area | Net Area × Number of Coats | Cumulative surface area across all coats |
| Paint before waste | Total Coat Area ÷ Coverage Rate | Theoretical baseline gallons required |
| Paint after waste | Paint Before Waste × (1 + Waste) | Practical purchase estimate with safety margin |
Want a faster, automated breakdown? The Calculante Paint Calculator instantly accounts for room dimensions, individual walls, doors, windows, multiple coats, specific paint coverage rates, waste allowances, ceilings, optional primer, and custom project areas without manual math.

How to Calculate Paint Coverage
Paint coverage is the total surface area a specific volume of paint can effectively cover, typically specified by the manufacturer. Calculating total paint requirements accurately involves comparing your paintable surface area and number of coats against this stated coverage rate rather than assuming a universal standard.
What Does Paint Coverage Mean?
Paint coverage refers to the measure of area that a single container of paint can coat with adequate film thickness and opacity. Paint manufacturers usually express this metric as square feet per gallon (or square meters per liter for metric products) on the product label or technical data sheet.
Stated coverage rates serve as a standardized baseline estimate. Real-world results often vary because of surface textures, application methods, and substrate absorption. Always refer directly to the manufacturer's official specifications for the most accurate starting point.
The Paint Coverage Formula
To determine the exact quantity of paint required for a project before factoring in waste or container sizes, use the core equation:
Paint Needed = Total Coat Area ÷ Paint CoverageTotal Coat Area: The net paintable surface area multiplied by the total number of coats being applied.
Paint Coverage: The manufacturer's stated coverage rate per gallon or liter.
Paint Needed: The theoretical baseline volume required before accounting for waste, application losses, or retail purchasing constraints.
How to Calculate Paint Coverage Step by Step
Paint Coverage Example
Consider an illustrative project scenario using standard parameters:
- Paintable area: 800 sq ft
- Number of coats: 2
- Total coat area: 1,600 sq ft (800 × 2)
- Paint coverage: 350 sq ft per gallon
Calculation: 1,600 ÷ 350 = 4.57 gallons
This calculated figure represents an estimate of paint volume required before adding any waste allowance or rounding up to available commercial container sizes.
Square Feet per Gallon
Commonly utilized in the United States and regions following Imperial or US customary units. Coverage values represent square footage coated per US gallon (1 US gallon is approximately 3.785 liters).
Square Meters per Liter
Metric formulations specify coverage in square meters per liter. Avoid comparing numerical values directly across systems without converting units properly (1 square meter is approximately 10.764 square feet).
Surface Texture
Smooth drywall absorbs paint differently than heavily textured plaster, knockdown, or brick surfaces.
Surface Porosity
Bare, unsealed, or porous drywall requires more material as initial coats soak into the substrate.
Existing Color
Transitioning from a dark color to a light shade can necessitate extra preparation or extra coats.
Application Method
Rollers, brushes, and professional paint sprayers deposit paint at varying film thicknesses and consumption rates.
Paint Product
Different chemical formulations, sheens, and grades feature unique manufacturer-stated coverage specifications.
Skill & Application
Individual technique, wet film thickness control, and tool saturation directly impact real-world consumption.
Manufacturer-Stated Coverage vs. Actual Project Coverage
The coverage figure printed on a paint can is typically derived from laboratory conditions or standardized testing environments. In actual painting projects, performance fluctuates due to variable surface preparation, texture, porosity, application tools, environmental conditions, and coat counts.
Always treat manufacturer-stated coverage as a reliable baseline reference point rather than an absolute guarantee for your specific walls and ceilings.
Wall and Ceiling Coverage Considerations
Walls and ceilings frequently involve different surface conditions, texture profiles, and paint formulations. Ceilings are often painted with flat, non-reflective specialty paints that may feature distinct coverage specifications compared to wall paints. When ceilings require separate products or unique coat counts, calculate their surface area independently.
Paint Coverage Calculation Guide
| Step | Calculation | Example |
|---|---|---|
| Paintable area | Net wall/ceiling dimensions | 800 sq ft |
| Number of coats | Planned coating layers | 2 coats |
| Total coat area | Paintable Area × Coats | 1,600 sq ft |
| Coverage rate | Manufacturer specification | 350 sq ft/gallon |
| Estimated paint required | Total Coat Area ÷ Coverage | 4.57 gallons |
| Waste allowance | Project-specific safety buffer | Variable percentage |
| Final purchasing estimate | Rounded container quantities | Commercial units |
Common Mistakes
1. Universal Coverage Assumption: Applying a single generic coverage rate to every paint product regardless of formulation.
2. Forgetting Coats: Multiplying coverage against single-surface area instead of total coat area.
3. Omitting Deductions: Failing to subtract doors and windows from gross surface measurements.
Evaluation Errors
4. Ignoring Texture: Overlooking how porous or textured drywall increases paint absorption.
5. Raw Math Confusion: Treating theoretical mathematical output as the exact physical cans to purchase without considering retail sizes or waste.
The Calculante Paint Calculator seamlessly integrates surface dimensions, coat counts, manufacturer coverage specifications, opening deductions, and waste allowances to generate a practical purchasing estimate.
How Much Paint Does a Gallon Cover?
A standard gallon of interior paint often covers several hundred square feet under conditions specified by the manufacturer, but actual paint coverage varies significantly by product formulation, surface texture, porosity, application method, and the total number of coats applied.
How Many Square Feet Does a Gallon of Paint Cover?
Paint manufacturers provide a specific coverage rate, commonly expressed as square feet per gallon or square meters per liter. This manufacturer-stated coverage should serve as your primary reference point when evaluating wall paint coverage and estimating total project quantities.
While many standard interior paints fall into a broad baseline range of several hundred square feet per gallon, formulations differ widely. Premium paints, primers, specialized coatings, and textured finishes each feature distinct coverage specifications. Never rely on a single industry-wide guarantee for every product line.
Example: A Gallon Covering 350 Square Feet
To demonstrate how coverage rates scale mathematically, consider an illustrative product with a stated coverage of 350 square feet per gallon:
- 1 gallon → approximately 350 sq ft
- 2 gallons → approximately 700 sq ft
- 3 gallons → approximately 1,050 sq ft
- 4 gallons → approximately 1,400 sq ft
- 5 gallons → approximately 1,750 sq ft
These figures represent baseline mathematical examples based purely on an assumed 350 sq ft/gallon rate, rather than universal standards for all paint products.
How Many Gallons of Paint Do I Need?
Determining the total volume required for an interior painting project requires factoring in both surface dimensions and specific product performance using the core calculation:
Gallons Needed = Total Paintable Area × Number of Coats ÷ Coverage per GallonThe mathematical output must then be adjusted for real-world variables, including waste allowances, substrate texture, surface porosity, additional touch-up needs, specific container sizes, and product-specific coverage ratings. Consequently, your theoretical calculation and final purchase quantity will often differ.
Gallons of Paint by Paintable Area
| Paintable Area | 1 Coat | 2 Coats |
|---|---|---|
| 100 sq ft | 0.29 gal | 0.57 gal |
| 250 sq ft | 0.71 gal | 1.43 gal |
| 500 sq ft | 1.43 gal | 2.86 gal |
| 750 sq ft | 2.14 gal | 4.29 gal |
| 1,000 sq ft | 2.86 gal | 5.71 gal |
| 1,500 sq ft | 4.29 gal | 8.57 gal |
| 2,000 sq ft | 5.71 gal | 11.43 gal |
These figures are illustrative calculations using 350 sq ft per gallon. Actual paint requirements depend on the product's stated coverage, surface condition, number of coats, deductions, and waste.
Does One Gallon Cover Two Coats?
A common point of confusion among DIY painters is whether a single container covers a designated area twice. The answer depends entirely on your paintable surface area, manufacturer coverage, and total layer count.
For example, if a product covers 350 sq ft per gallon and your room surface measures 350 sq ft, applying one coat theoretically requires about 1 gallon, while applying two coats requires about 2 gallons. Always distinguish clearly between net surface area and total coat area.
How Much Paint for 500 Square Feet?
Using an illustrative 350 sq ft/gallon rate:
For 1 coat: 500 ÷ 350 = 1.43 gallons
For 2 coats: 500 × 2 ÷ 350 = 2.86 gallons
Practical purchase quantities depend heavily on available container sizes and specific product coverage ratings.
How Much Paint for 1,000 Square Feet?
Using the same illustrative 350 sq ft/gallon rate:
For 1 coat: 1,000 ÷ 350 = 2.86 gallons
For 2 coats: 1,000 × 2 ÷ 350 = 5.71 gallons
These values serve as mathematical examples rather than universal purchasing recommendations.
Textured Surfaces
Textured walls and ceilings feature irregularities that increase surface area and consume more paint than smooth drywall.
Porous Surfaces
Bare, unsealed, or highly absorbent substrates soak up moisture and binder, requiring additional paint volume.
New Drywall
Fresh drywall installations require proper preparation and priming to prevent excessive absorption of finish coats.
Color Changes
Transitioning dramatically from dark to light shades can demand extra coats to achieve complete coverage and proper opacity.
Application Method
Rollers, brushes, and professional sprayers deposit varying film thicknesses, altering overall paint consumption.
Paint Product
Different chemical formulations, resin qualities, and product lines feature unique manufacturer-stated coverage specs.
Coverage vs. Purchase Quantity
Estimated Paint Requirement: The mathematical volume derived from area, coats, and coverage specs.
Purchase Quantity: The actual amount bought after factoring in retail container sizes, waste allowances, and touch-up needs. A calculated need of 2.86 gallons requires selecting available container combinations.
Gallon vs. Quart Containers
Paint is retailed in multiple container sizes to match project scales. Remember that 1 US gallon equals 4 US quarts, and metric conversions establish that 1 US gallon is approximately 3.785 liters. Calculators must account for container sizing rather than treating every unit as a full gallon.
How Much Paint Does a Liter Cover?
Metric paint products typically specify coverage in square meters per liter (m²/L). For instance, an illustrative product might feature a stated coverage rate of 10 square meters per liter:
- 1 liter → 10 m² means 1 liter of paint covers 10 square meters[cite: 3].
- 2 liters → 20 m² means 2 liters cover 20 square meters[cite: 3].
- 5 liters → 50 m² means 5 liters cover 50 square meters[cite: 3].
Always check the metric coverage rate printed directly on your specific product container rather than treating 10 m²/L as a universal standard.
Manufacturer Coverage is the Best Reference
While generic planning estimates and online guidelines provide a helpful starting point, a paint product's official label or technical data sheet remains the most accurate source for its true coverage capacity. Manufacturer specifications can vary substantially across different paint types, product tiers, gloss finishes, primers, and specialized architectural coatings.
How much area does 1 gallon cover?
Coverage varies by product formulation and should always be determined using the manufacturer's stated specifications.
How many gallons for 1,000 sq ft?
It depends on coverage and coat count. At a 350 sq ft/gallon rate, one coat requires about 2.86 gallons and two coats require 5.71 gallons.
Does two coats use twice as much?
Yes, as a core planning calculation, applying two coats doubles the total coat area compared to a single coat.
Does coverage include two coats?
No, manufacturer coverage describes a single coat under stated conditions; users must multiply by their total coat count.
The Calculante Paint Calculator allows users to effortlessly combine surface area, coat counts, product coverage rates, and container sizes to estimate exact project requirements.
FREE LOCAL PAINTING QUOTES
Too big for a DIY project? Get free quotes from local painting pros.
How Many Coats of Paint Do I Need?
Determining the right number of paint coats depends on factors such as your chosen paint product, existing surface color, new versus previously painted surfaces, surface condition, primer usage, desired finish, and manufacturer instructions. While one coat is sometimes sufficient, many painting projects require additional coats to achieve proper opacity and visual uniformity.
Why Do Multiple Coats of Paint Matter?
Each additional coat adds another layer of paint over the same surface area, directly multiplying the total volume of coating required. Understanding how paint quantity scales with layers is essential when planning your project using a reliable Paint Calculator.
Total Coat Area = Paintable Area × Number of CoatsFor example, on a 500 sq ft paintable surface:
- 1 coat = 500 sq ft of coat coverage
- 2 coats = 1,000 sq ft of coat coverage
- 3 coats = 1,500 sq ft of coat coverage
This direct relationship explains why increasing the number of paint coats increases the total amount of paint required.
Is One Coat of Paint Enough?
One coat of paint can sometimes be completely sufficient when the existing surface is in good condition, the new color closely matches the existing shade, the paint product provides high coverage, the surface has been properly prepared, and the manufacturer recommends or allows a single-coat application.
However, one coat of interior paint may be less suitable when changing dramatically between colors, painting a porous or uneven surface, covering stubborn stains, applying product over an unsuitable substrate, or noticing that the first layer fails to provide uniform coverage. One coat is not inherently inferior, but its success depends strictly on project conditions.
When Do You Need Two Coats of Paint?
Two coats of paint are common for many residential and commercial projects, but the ideal number depends entirely on the specific product and wall conditions. A second coat of paint is typically valuable for improving color uniformity, achieving consistent opacity, masking the previous color completely, correcting minor streaks from the first pass, and delivering the rich appearance specified by the manufacturer.
Always prioritize the paint manufacturer's instructions over general rules of thumb, as formulation quality and pigmentation levels vary wildly across different paint lines.
How Many Coats When Painting Over a Dark Color?
Changing from a dark shade to a substantially lighter color can require additional coats depending on paint opacity, existing pigments, new color saturation, primer usage, surface condition, and product specifications. Applying a suitable primer or tinted primer can sometimes assist with significant color transitions, though primer alone does not always eliminate the need for multiple finish coats.
Dark Over Light
Covering a light background with a dark color may require fewer coats when the new product provides strong opacity, though actual requirements still depend heavily on the specific paint formulation.
Light Over Dark
Painting light over dark typically demands additional coats or an appropriate primer to block bleed-through and achieve a uniform, streak-free result.
How Many Coats for New Drywall?
New drywall and unpainted surfaces require careful preparation before applying finish paint. Properly finished drywall must be sealed or primed to equalize absorption differences across joint compound and paper facings. Because primer and finish paint serve distinct technical purposes, always factor in manufacturer recommendations regarding priming schedules and finish coat counts.
How Many Coats of Paint Does a Ceiling Need?
Ceiling paint requirements depend on existing ceiling color, surface condition, product opacity, substrate absorption, desired appearance, and whether a dedicated ceiling coating is used. Ceilings frequently require specialized flat paints or unique coverage assumptions compared to standard interior walls.
Similar Color
A similar color may require fewer coats if the first application provides adequate, even coverage across the room.
Light Over Light
Similar light colors usually cover relatively easily, depending heavily on the quality and pigment load of the paint product.
Dark Over Light
Strong-opacity paint can often provide coverage efficiently, but product specifications dictate the exact required coats.
Light Over Dark
Additional coats or a specialized primer are often needed to ensure uniform, streak-free coverage.
New or Porous Surface
Substrate preparation and proper priming directly influence how many finish coats the surface absorbs.
Stained or Uneven Surface
Stained and patchy areas require targeted spot-priming or sealing before applying finish paint coats.
How Does the Number of Coats Affect Paint Quantity?
To see how layer count scales your paint quantity, consider a standard project using an illustrative paint coverage of 350 sq ft per gallon and a paintable area of 1,000 sq ft:
- 1 Coat: 1,000 ÷ 350 = 2.86 gallons
- 2 Coats: 2,000 ÷ 350 = 5.71 gallons
- 3 Coats: 3,000 ÷ 350 = 8.57 gallons
These numbers represent theoretical paint quantities based on an illustrative 350 sq ft/gallon rate before accounting for waste and practical purchasing adjustments.
Paint Quantity by Number of Coats
The table below demonstrates how total coat area and theoretical paint requirements scale across multiple coats for a 1,000 sq ft paintable area, using an illustrative coverage rate of 350 sq ft per gallon:
| Number of Coats | Total Coat Area | Theoretical Paint |
|---|---|---|
| 1 | 1,000 sq ft | 2.86 gal |
| 2 | 2,000 sq ft | 5.71 gal |
| 3 | 3,000 sq ft | 8.57 gal |
| 4 | 4,000 sq ft | 11.43 gal |
| 5 | 5,000 sq ft | 14.29 gal |
These are illustrative calculations using 350 sq ft per gallon and do not account for waste, surface conditions, or product-specific coverage.
How Do You Know If a Second Coat Is Needed?
Evaluating whether a second coat of paint is necessary requires looking for visual indicators such as uneven color depth, visible underlying old paint, a patchy or streaky appearance, inconsistent sheen levels across the wall, or areas showing thin coverage. Always evaluate the surface only after the first coat has dried completely according to the manufacturer's recommended drying time. Never judge coverage while the paint is still wet.
Don't Confuse Drying Time with Recoat Time
It is vital to distinguish between dry-to-touch, ready-for-another-coat, and fully cured states. These timelines vary significantly by product formulation, humidity, and temperature. Always follow the manufacturer's precise instructions for recoat timing to avoid lifting or ruining your paint layers.
Forgetting to Multiply by Coats
Failing to multiply surface area by the intended number of coats results in severe paint shortages.
Using the Wrong Coverage Rate
Assuming a universal coverage rate instead of checking the specific product label leads to inaccurate estimates.
Ignoring Existing Color
Overlooking drastic color transitions can leave you short on paint when extra coats are required.
Forgetting Surface Preparation
Skipping proper prep work increases substrate absorption and forces you to apply unexpected extra coats.
Buying Exact Math
Purchasing the exact theoretical mathematical amount without rounding up for waste causes project delays.
Can I paint a wall with one coat?
It depends entirely on the paint product, substrate condition, existing color, preparation, and manufacturer instructions.
Is two coats of paint better than one?
Two coats provide more uniform opacity when the product and project call for it, but the appropriate number depends on circumstances.
Do I need three coats of paint?
Three coats are not universally required and are usually reserved for difficult color transitions or specific specialty coatings.
Does a second coat use twice as much?
Yes, for planning purposes, two coats approximately double the total coat area compared with a single coat.
Should I calculate paint separately for each coat?
The number of coats can be seamlessly incorporated into your total paint quantity calculation by multiplying your total paintable area by your desired coat count before dividing by the product's coverage rating.
The Calculante Paint Calculator allows users to effortlessly select the precise number of coats so that your estimated paint quantity accurately reflects your total coating requirements.
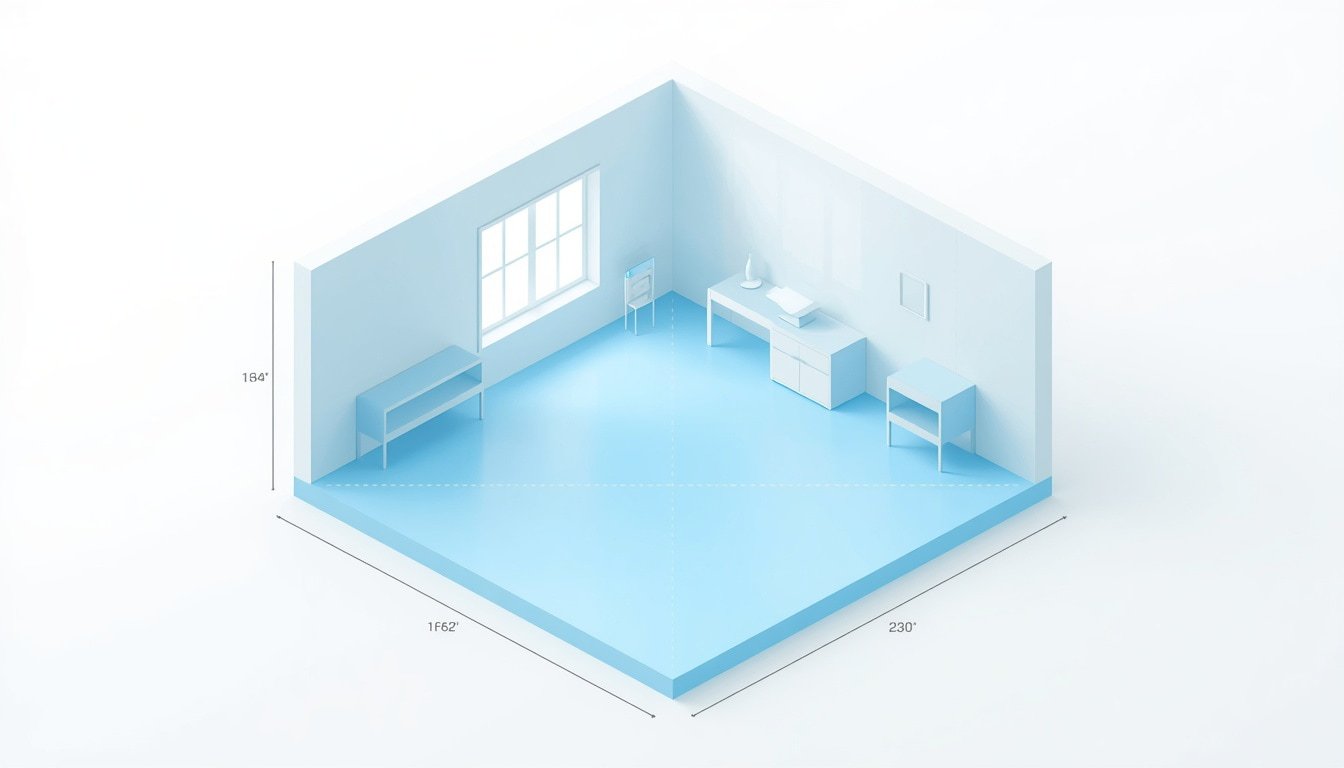
Paint Calculator for Walls and Ceilings
Wall paint is based on the total wall surface area, while ceiling paint is calculated using the ceiling's horizontal area. Doors and windows can be deducted from the wall area when applicable. These two distinct spaces can then be combined if the same paint product, coverage rate, and number of coats apply to your interior painting project.
How to Calculate Wall Paint Area
Determining your wall surface area begins by finding the gross perimeter and multiplying it by the wall height. For a standard rectangular room with four walls, the formula is:
Gross Wall Area = 2 × (Room Length + Room Width) × Wall HeightTo find your net paintable wall surface, you must subtract large architectural openings such as doors and windows:
Net Wall Area = Gross Wall Area − Door and Window AreaAccounting for these openings prevents overestimating your paint requirements, ensuring your room dimensions translate into a precise wall paint calculator estimate.
How to Calculate Ceiling Paint Area
Calculating a standard flat rectangular ceiling is straightforward because it relies solely on the room's floor dimensions. For a typical flat layout, the formula is:
Ceiling Area = Room Length × Room WidthWhile walls are calculated using perimeter multiplied by wall height, a ceiling uses length multiplied by width. Keep in mind that specialized architectural features such as sloped surfaces, tray ceilings, or vaulted details require separate targeted measurements and may alter your total ceiling paint requirements.
Walls
Wall calculations rely on perimeter multiplied by height, minus door and window openings to find net wall square footage.
Ceiling
Ceiling calculations focus exclusively on the horizontal surface area derived from room length and width dimensions.
Separate Products
Walls and ceilings frequently utilize different paint finishes, coverage rates, colors, or coats, making separate estimates necessary.
Worked Example: Walls and Ceiling
To see how room dimensions translate into paint quantity, consider a room measuring 12 ft long, 10 ft wide, and 8 ft high, featuring one door (3 ft × 7 ft) and two windows (3 ft × 4 ft each), painted with 2 coats at an illustrative coverage of 350 sq ft per gallon:
- Step 1 — Gross wall area: 2 × (12 + 10) × 8 = 352 sq ft
- Step 2 — Door deduction: 3 × 7 = 21 sq ft
- Step 3 — Window deductions: 2 × (3 × 4) = 24 sq ft
- Step 4 — Net wall area: 352 − 21 − 24 = 307 sq ft
- Step 5 — Ceiling area: 12 × 10 = 120 sq ft
- Step 6 — Combined one-coat paintable area: 307 + 120 = 427 sq ft
- Step 7 — Two-coat surface area: 427 × 2 = 854 sq ft
- Step 8 — Illustrative paint requirement: 854 ÷ 350 = 2.44 gallons
This is a mathematical estimate based on an illustrative coverage rate. Final gallons of paint can vary depending on actual manufacturer specifications, substrate texture, and waste allowances.
Different Paint Products
Walls often use durable washable finishes like satin or eggshell, while ceilings typically require flat matte coatings.
Different Coverage Rates
Specialty ceiling paint and heavy wall formulations feature unique manufacturer coverage specs that rarely match.
Different Number of Coats
Ceilings may only need a single refresh coat, whereas walls often require two coats for rich color uniformity.
Different Colors
Contrasting wall colors and crisp white ceilings require separate calculations to prevent incorrect material estimates.
Wall and Ceiling Paint Calculation Quick Reference
Use this reference breakdown to see how basic formulas and surface deductions apply across different parts of a room:
| Surface | Basic Formula | What to Deduct |
|---|---|---|
| Four rectangular walls | 2 × (L + W) × H | Doors and windows |
| Ceiling | L × W | Usually none for a standard flat ceiling |
| Walls + ceiling | Net wall area + ceiling area | Wall openings |
Unusual architectural layouts or open-plan spaces may require splitting surfaces into smaller individual geometric calculations.
What About Rooms That Are Not Perfect Rectangles?
Simple length-and-width formulas work best for standard rectangular rooms, but real-world spaces often feature L-shapes, open-plan layouts, vaulted ceilings, sloped rooflines, or large built-in openings. For these complex interiors, break the room down into smaller, uniform rectangular sections, calculate each zone independently, and sum the results to find your true paintable area.
Walls Only vs. Walls + Ceiling
Your total material requirements shift drastically depending on whether you are refreshing just the vertical boundaries or the entire room envelope:
- Walls Only: Uses net wall area minus openings, ideal when leaving ceiling paint untouched.
- Ceiling Only: Uses ceiling area exclusively for overhead-only painting projects.
- Walls + Ceiling: Combines net wall area and ceiling square footage for complete interior room transformations.
Tips for Estimating Paint for Walls and Ceilings
- Measure walls and ceilings separately to maintain accuracy across different structural planes.
- Deduct large doors and windows from your gross wall area to avoid buying excess paint.
- Check the paint manufacturer's stated coverage printed directly on the product data sheet.
- Account for the number of coats by multiplying surface area totals by your required layer count.
- Keep wall and ceiling calculations separate whenever product types, finishes, or color schemes differ.
The Calculante Paint Calculator allows users to effortlessly estimate paint requirements by combining room dimensions, wall and ceiling surfaces, openings, coats, and coverage assumptions into one seamless tool.
Do I calculate wall and ceiling paint separately?
Yes, separating them is recommended when using different paint products, colors, coverage rates, or coat counts.
How do I calculate ceiling paint?
Multiply the room length by the room width for a standard flat horizontal ceiling area.
Do I subtract windows and doors from wall area?
Yes, large doors and windows should be deducted from gross wall square footage to ensure precise estimation.
Can I use the same paint calculation for walls and ceilings?
You can combine them only if the exact same paint product, color, and number of coats apply to both surfaces.
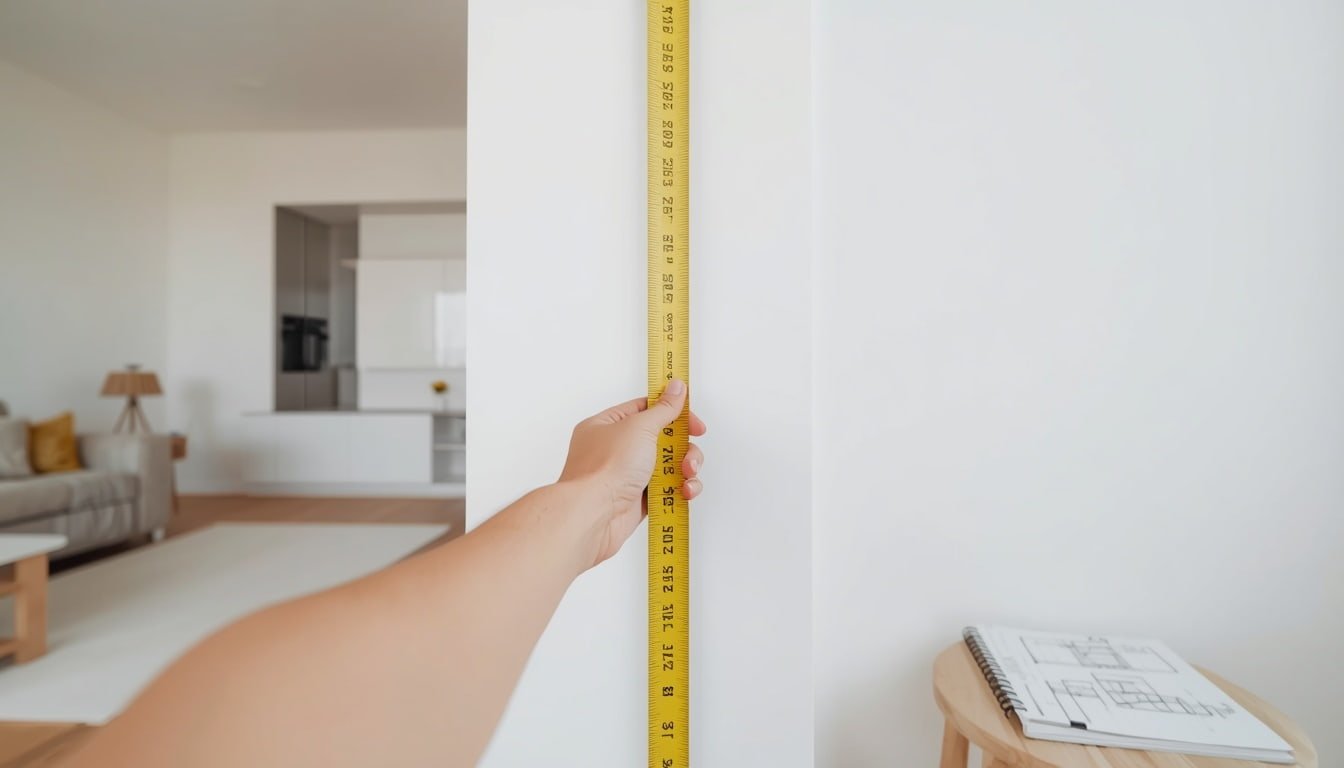
How to Measure a Room for Painting
Accurately measuring a room for painting involves capturing the room length, width, wall height, and the exact dimensions of doors and windows. By recording these core room dimensions, you can determine your exact paintable surface area before inputting your data into a Paint Calculator.
What You Need Before Measuring
Gathering the right tools beforehand ensures your room measurements for painting are precise, consistent, and quick to collect.
Tape Measure
A reliable steel tape measure is essential for accurately capturing wall dimensions across longer spans.
Notepad or Phone
Record every individual wall, door, and window dimension immediately to avoid estimation errors.
Calculator
Useful for double-checking your recorded numbers and preparing your figures for your paint coverage estimates.
Ladder or Safe Access
Use a sturdy ladder only when necessary to safely reach high ceilings and upper wall boundaries.
Step 1: Measure the Room Length
Start by measuring the longest horizontal dimension of your room. Extend your tape measure from one baseboard directly across to the opposite baseboard along the floor. Record this length in feet and inches, keeping units consistent. Never estimate or guess room dimensions, as even minor discrepancies compound when calculating total wall square footage and paintable area.
Step 2: Measure the Room Width
Next, measure the shorter horizontal dimension spanning the perpendicular walls to establish your room width. Length and width simply represent the two primary floor boundaries of a standard rectangular space. For irregular or L-shaped rooms, you may need to divide the floor plan into separate rectangular zones before measuring each sub-section individually.
Step 3: Measure Wall Height
Measure vertically from the finished floor up to the ceiling line. Do not assume every room features standard 8-foot ceilings; measure the actual height at multiple points if the floor or ceiling is uneven. Wall height is a critical multiplier when measuring walls for paint, as even a small height variance significantly shifts your overall surface totals.
Step 4: Measure Doors and Windows
Large structural openings must be accounted for to prevent overestimating your required paint quantity. Measure the width and height of each door frame and window casing. For example, two windows measuring 3 ft by 4 ft equal 12 sq ft each, totaling 24 sq ft of non-paintable surface that can be deducted from your gross wall dimensions.
Opening Deduction = Width × Height (deducted from gross wall area)Step 5: Measure the Ceiling
For a standard flat rectangular room, ceiling square footage relies directly on your horizontal room dimensions. Multiply your recorded ceiling length by the ceiling width. Keep in mind that specialized overhead designs—such as vaulted ceilings, sloped rooflines, tray ceilings, or coffered details—require separate targeted measurements to capture their true expanded surface areas.
Step 6: Identify Additional Paintable Areas
Beyond standard walls and ceilings, several secondary surfaces may impact your interior painting project planning:
Closets
Measure walk-in or reach-in closets separately if their interior walls are scheduled to be painted.
Accent Walls
Treat feature walls as distinct surface areas, especially if they require a unique color or finish treatment.
Built-In Areas
Identify shelving units, alcoves, or recessed niches that add or subtract from your total paintable area.
Trim and Baseboards
Baseboards, crown molding, and door casings are typically measured separately when using specialized trim paint.
How to Measure an Irregular Room
Real-world homes frequently feature L-shapes, open-plan spaces, alcoves, or diagonal walls. To measure these spaces correctly, divide the irregular floor plan into smaller, manageable rectangular sections. Measure the length, width, and height of each sub-section independently, calculate their individual surface areas, and sum them together while deducting any major openings.
Worked Measurement Example
To see how a structured measurement record looks in practice, consider a standard room with the following dimensions:
| Measurement Element | Recorded Value |
|---|---|
| Room length | 12 ft |
| Room width | 10 ft |
| Wall height | 8 ft |
| Doors | One door (3 ft × 7 ft) |
| Windows | Two windows (3 ft × 4 ft each) |
| Ceiling dimensions | 12 ft × 10 ft |
These organized room dimensions supply all the baseline figures needed to calculate net wall area, ceiling square footage, and overall paint requirements.
Room Painting Measurement Checklist
Review this checklist before you finish your site survey to ensure no critical dimension is overlooked:
- ✓ Room length
- ✓ Room width
- ✓ Wall height
- ✓ Number of doors
- ✓ Door dimensions (width and height)
- ✓ Number of windows
- ✓ Window dimensions (width and height)
- ✓ Ceiling dimensions
- ✓ Closets or additional alcoves
- ✓ Accent walls
- ✓ Unusual architectural surfaces
Common Measuring Mistakes to Avoid
Guessing Dimensions
Estimating room sizes by eye instead of using a physical tape measure leads to inaccurate paint purchasing.
Forgetting Wall Height
Calculating floor perimeters without multiplying by wall height leaves out entire vertical surface areas.
Ignoring Openings
Failing to deduct large doors and windows causes unnecessary over-estimation of required paint quantities.
Mixing Units
Combining feet and inches or metric units inconsistently creates math errors in your final calculations.
Missing Additional Areas
Overlooking closets, pantries, or recessed architectural details results in running out of paint midway.
Oversimplifying Layouts
Treating complex L-shaped rooms as single rectangles instead of dividing them into measured zones.
Precise room measurements form the foundation of any accurate paint estimate. By following a structured workflow—measuring dimensions, calculating surface area, deducting openings, accounting for coats, and factoring in paint coverage—you can input your numbers directly into the interactive Paint Calculator to determine exact project requirements.
What measurements do I need to calculate paint?
You need room length, room width, wall height, and the exact dimensions of doors and windows.
Do I need to measure every wall?
Yes, or measure two adjacent walls and use the perimeter formula to calculate all four walls efficiently.
Should I measure doors and windows?
Yes, measuring large openings allows you to subtract their area from gross wall space for better accuracy.
How do I measure a room with an unusual shape?
Divide the irregular space into smaller rectangular zones, measure each section, and sum the results.
FREE LOCAL PAINTING QUOTES
Too big for a DIY project? Get free quotes from local painting pros.
Paint Waste Allowance: How Much Extra Paint Should You Buy?
A practical paint estimate often includes an additional allowance above the theoretical calculated quantity, but the appropriate amount depends on surface condition, application method, complexity, product type, and the need for future touch-ups. Understanding this distinction helps bridge the gap between mathematical calculations and what you actually feed into a Paint Calculator.
What Is Paint Waste Allowance?
Paint waste allowance is an additional amount added to the theoretical paint requirement to account for practical losses and project uncertainty. Real painting projects rarely use every single ounce of paint with absolute mathematical perfection. Material loss can occur across several practical scenarios:
- Can residue: Small amounts of paint remaining inside empty cans.
- Tool absorption: Paint absorbed into rollers, brush bristles, and tray liners.
- Application losses: Accidental drips, minor spills, and cleanup residue.
- Substrate variations: Minor surface irregularities requiring extra coating thickness.
This means "waste" does not necessarily signify that product is literally thrown away; rather, it represents the real-world operational margin required to complete a project successfully.
How Much Extra Paint Should You Buy?
While a small additional allowance is commonly considered for straightforward projects, there is no single percentage that is universally appropriate for every room or surface. Planning allowances often span specific ranges depending on project conditions:
- 0%: Very controlled or perfectly simple projects with exact measurements.
- 5%: Relatively straightforward interior painting jobs with smooth walls.
- 10%: Practical general allowance for typical residential rooms.
- 15%: More complex or uncertain projects with multiple architectural features.
- Higher allowances: Unusual textures, difficult application methods, or extensive future touch-up needs.
Always prioritize paint manufacturer recommendations and specific site conditions over generalized planning percentages.
Paint Waste Allowance Example
To see how an allowance alters your total volume, consider a theoretical requirement of 4 gallons:
| Allowance | Additional Paint | Total Calculated Requirement |
|---|---|---|
| 0% | 0 gal | 4.00 gal |
| 5% | 0.20 gal | 4.20 gal |
| 10% | 0.40 gal | 4.40 gal |
| 15% | 0.60 gal | 4.60 gal |
The actual retail purchase quantity may need to be rounded up to available container sizes. For example, if paint is sold exclusively in 1-gallon cans, a calculated 4.4 gallons means you may need to purchase 5 gallons.
When Should You Allow More Extra Paint?
Rough or Textured Surfaces
Textured walls or stucco consume more material because the paint must cover a larger surface area.
Porous or Absorbent Surfaces
Drywall or unprimed substrates can absorb more initial coating, requiring extra volume.
Dark-to-Light Color Changes
Significant color transitions may require additional product or extra coats depending on the paint system.
Complex Rooms
Many corners, alcoves, and architectural features increase application difficulty and material loss.
DIY Application
Inexperienced application techniques may produce slightly different material consumption rates.
Future Touch-Ups
Retaining a small amount of matching paint can be highly useful for future scuffs and repairs.
When You May Not Need Much Extra Paint
Excessive overbuying can leave homeowners with unwanted leftover product and unnecessary expense. You may not need a high allowance under conditions such as:
- Simple rectangular rooms with smooth, flat drywall.
- Consistent, highly controlled application methods.
- Extremely precise room measurements with minimal cut-ins.
- One large, uninterrupted surface area with clear manufacturer coverage rates.
The primary goal is balanced project planning rather than automatically purchasing the highest possible overage.
Extra Paint vs. Leftover Paint
It helps to distinguish between a calculated waste allowance and intentional leftover paint. Keeping a modest amount of matching product can assist with future home maintenance tasks:
- Repairing minor wall scuffs or scratches.
- Filling nail holes after hanging pictures.
- Performing minor touch-ups around doorframes and baseboards.
Leftover paint intended for touch-ups should always be sealed and stored properly according to the manufacturer's storage guidelines.
Why You Should Not Automatically Round Up Too Much
While having too little paint creates project delays, buying significantly too much introduces drawbacks:
- Unnecessary expense: Premium interior paint represents a notable project cost.
- Storage constraints: Large leftover containers clutter garages and storage spaces.
- Batch matching issues: Buying extra cans far beyond what is needed rarely helps if colors shift across manufacturing batches later.
A practical, measured allowance strikes the ideal balance between security and economy.
Illustrative Paint Waste Allowance Guide
Review these planning brackets as general guidelines rather than rigid industry mandates:
| Project Condition | Example Planning Allowance |
|---|---|
| Simple, smooth, well-measured project | 0%–5% |
| Typical interior room | Around 5%–10% |
| Multiple openings or complex layout | Around 10%–15% |
| Rough, porous, or unusually difficult surface | 15%+ may be considered |
Manufacturer instructions and actual site conditions should always take precedence over general planning charts.
How Waste Fits Into the Paint Calculation
Mathematically, integrating a waste factor into your estimating workflow follows a straightforward sequence:
Paint Before Waste = (Paintable Area × Coats) ÷ Coverage RateOnce you establish the baseline requirement, you apply your chosen allowance percentage:
Paint With Waste = Paint Before Waste × (1 + Waste Allowance)For instance, if your theoretical requirement is 4 gallons and you select a 10% allowance ($4 \times 1.10 = 4.4$ gallons), your final step involves translating that figure into actual retail container sizes.
Why Container Size Matters
Paint is typically sold in standardized retail volumes such as gallons, quarts, or liter cans depending on the region. Because calculated figures like 4.4 gallons do not match physical container sizes directly, buyers must round up to the nearest logical retail combination (such as four 1-gallon cans and one quart can, or five 1-gallon cans) to ensure the job finishes without interruption.
Before Buying Paint, Check These 6 Things
- ✓ Confirm your measured paintable area
- ✓ Confirm the number of coats required
- ✓ Check the manufacturer's stated coverage rate
- ✓ Consider substrate texture and surface condition
- ✓ Choose a reasonable, realistic waste allowance
- ✓ Round your total volume to practical container sizes
Keep your final paint label, product name, exact color name, and tint code recorded for future reference and touch-ups.
The Calculante tool helps streamline this entire process by allowing users to account for paintable surface area, coating counts, coverage specifications, waste allowances, and purchase quantities. Using a reliable Paint Calculator ensures your project planning remains accurate from start to finish.
How much extra paint should I buy?
A typical planning allowance ranges from 5% to 15% extra depending on project complexity and surface texture.
What percentage of paint should I allow for waste?
Many standard residential rooms utilize around a 10% allowance to cover application losses and tool absorption.
Should I buy extra paint for touch-ups?
Yes, keeping a small amount of matching paint in a sealed container is useful for future scuffs and wall repairs.
Should I round up my paint purchase?
Yes, always round your final decimal quantities up to the nearest available retail container sizes.
Primer vs. Paint: Do You Need Primer?
Do I need primer before painting? Primer is not automatically required for every repainting project. It can be especially useful on new drywall, porous surfaces, repaired areas, stains, significant color changes, or surfaces where improved adhesion or uniformity is needed. Product instructions and surface conditions should guide your final decision.
What Is Primer?
Primer is a specialized preparatory coating applied before painting surfaces. It serves several foundational purposes depending on the condition of your walls:
- Creating a suitable, uniform surface for the finish coat.
- Improving adhesion in appropriate situations, such as over glossy or tricky substrates.
- Sealing highly porous surfaces to prevent excessive absorption of finish paint.
- Helping block certain stains or minimize bleed-through from problem areas.
While valuable in many scenarios, primer does not universally improve every single paint job; its necessity depends entirely on what lies beneath your new coat.
Primer vs. Paint: What Is the Difference?
Primer
Acts as a foundational preparatory layer designed to seal, adhere, and create a uniform base rather than provide a final color.
Paint
Provides the final color, sheen, and aesthetic appearance while offering protection formulated for the intended finished surface.
Paint-and-Primer Products
Self-priming paints combine functions, but the product label and specific surface condition should determine if a separate primer is still needed.
When Should You Use Primer?
New Drywall
New drywall and joint-compound areas are highly porous and benefit significantly from an appropriate primer/sealer.
Bare or Unpainted Surfaces
Previously uncoated materials often require a suitable primer depending on the specific substrate and coating system.
Porous Surfaces
Porous materials absorb coatings unevenly, meaning a primer helps level out absorption rates across the wall.
Significant Color Changes
Major color transitions may benefit from a tinted primer or proper base layer depending on existing shades.
Stains or Problem Areas
Certain water stains, smoke damage, or tannin bleed require a specialized stain-blocking primer.
Repaired Areas
Patched wall sections reflect finish paint differently than surrounding paint, making localized priming useful.
When Might You Not Need a Separate Primer?
A separate primer coat is not always mandatory for every project. You may be able to skip a separate primer under specific conditions:
- Existing paint is structurally sound, clean, and well-adhered.
- The wall surface has been appropriately cleaned and lightly sanded if necessary.
- The new finish paint is fully compatible with the existing coating layer.
- The color change is minimal and the sheen level is comparable.
- Manufacturer instructions for your chosen product explicitly permit direct application without primer.
Evaluating your specific wall history ensures you avoid unnecessary steps without risking adhesion failure.
When Primer May Be Useful
Review this general guide when evaluating different substrates and project situations:
| Surface or Situation | Primer Consideration |
|---|---|
| New drywall | Often useful |
| Previously painted, sound wall | May not require separate primer |
| Bare wood | Depends on product and coating system |
| Porous surface | Often benefits from appropriate primer |
| Repaired/patchy wall | May benefit from localized or full-surface priming |
| Significant stains | Specialized primer may be appropriate |
| Major color change | May help depending on existing and new colors |
| Metal or specialized substrates | Use a primer appropriate for the substrate |
This table serves as a general planning guide and does not replace specific manufacturer instructions.
Primer and Paint: Do You Calculate Them Separately?
When both primer and finish paint are required for a project, they should be calculated as separate materials. Doing so accounts for several operational differences:
- Primer and finish paint frequently feature different coverage rates per gallon.
- The number of coats required for primer may differ from your finish coat count.
- Container sizes and product pricing can vary between primer lines and finish paints.
- Some projects only call for primer on spot repairs rather than entire rooms.
Primer Calculation Example
To estimate primer requirements independently, use a basic area formula. For example, if you have:
- Primed area: 800 sq ft
- Primer coats: 1
- Primer coverage: 400 sq ft per gallon
800 sq ft × 1 coat ÷ 400 sq ft/gal = 2 gallons of primerActual product requirements may vary based on surface porosity, application tools, and specific manufacturer specifications.
Should You Prime the Entire Room?
Choosing how to apply primer depends closely on your room's condition. Common strategies include:
- Full-Surface Priming: Ideal when sealing raw drywall, switching drastic colors, or handling widespread porous wear.
- Spot Priming: Perfect for isolated nail-hole patches, repaired drywall seams, and localized stains.
- No Separate Primer: Appropriate when repainting sound, clean, compatible walls with matching finish specifications.
Primer Does Not Replace Surface Preparation
Applying primer is a vital step, but it is never a substitute for proper surface cleaning and preparation. Primer cannot magically bond to dirty, greasy, or flaking walls. Before priming or painting, ensure surfaces are free of dust, grease, loose paint, and moisture. Addressing underlying defects and structural repairs beforehand ensures your primer and paint layers perform reliably for years to come.
Primer, Coverage, and Paint Quantity
Understanding how primer influences overall project math helps prevent shortfalls. Primer acts as an independent foundational layer when utilized; it does not automatically subtract a fixed amount of finish paint from your total requirements. Finish paint coverage remains tied to its own product specifications, color depth, and application methods. When building your material estimate, treating primer and finish coats as separate calculations ensures complete project accuracy.
Quick Decision Guide
New or Bare Surface
Consider an appropriate primer or primer/sealer to ensure proper substrate absorption and bonding.
Sound Existing Paint
A separate primer may not be necessary if the current surface and new finish product are fully compatible.
Repairs and Stains
Localized or specialized stain-blocking primer can be useful to seal problem spots before rolling.
Major Color Changes
Primer can help create a uniform base layer depending on the contrast between existing and new shades.
Before You Buy Primer
- Identify the surface material and substrate type
- Check whether the surface is bare or previously painted
- Look closely for stains, patches, or repaired areas
- Consider whether your color is changing significantly
- Check the product's recommended coverage rate per gallon
- Confirm whether one or more primer coats are recommended
- Read the manufacturer's application instructions thoroughly
The interactive tools available on this platform can help you organize your project specifications, ensuring you clearly separate primer estimates from finish coatings. Utilizing a reliable Paint Calculator helps you factor in precise coverage rates for every stage of your project.
Do I need primer before painting?
Not always. It depends on whether your surface is new, stained, repaired, or changing colors drastically.
Can I paint directly over old paint?
Yes, if the existing paint is clean, sound, well-adhered, and compatible with your new coating.
Is primer necessary on new drywall?
Yes, raw drywall and joint compound are highly porous and require a dedicated primer/sealer.
Should I use primer for dark-to-light changes?
It can be beneficial to use a tinted or high-hiding primer to help transition major color shifts effectively.
Do I need primer over repaired drywall?
Spot-priming patches is recommended so filler areas don't flash or absorb finish paint unevenly.
Can paint-and-primer replace separate primer?
Self-priming paints work well on many prepared surfaces, but severe stains or raw drywall may still need a dedicated primer.
Paint Coverage by Surface Type and Finish
Does paint coverage change by surface type and finish? Yes, practical coverage can vary depending on surface porosity, texture, condition, application method, product formulation, and other project factors. The coverage printed by the manufacturer should always be treated as your primary product reference when using a Paint Calculator.
Understanding Practical vs. Stated Coverage
Manufacturer-stated coverage is an important starting point for any coating project. However, actual coverage can vary significantly in the real world. Surface texture, material porosity, and your chosen application method all influence how much product is consumed. Following product instructions helps ensure more predictable results across different interior painting projects.
Why Surface Type Affects Paint Coverage
Different interior surfaces interact with liquid coatings in unique ways. Factors such as substrate absorption, surface texture irregularities, uneven patches, and the condition of existing coatings change how much paint remains on the visible surface versus how much is soaked into the material. A smooth, sealed surface and a rough, porous surface will not consume paint at identical practical rates.
Paint Coverage by Surface Type
Smooth Previously Painted Walls
Properly prepared, sound painted surfaces generally provide relatively predictable application behavior.
New Drywall
New drywall and joint-compound areas can absorb coatings differently and require appropriate preparation.
Textured Walls
Surface texture increases effective area and may require additional material compared to flat walls.
Porous Surfaces
Porous substrates absorb more coating into their structure, affecting overall film build.
Wood
Wood grain, preparation, and product selection heavily influence final coating requirements.
Masonry or Concrete
Masonry features unique porosity and surface profiles that differ substantially from standard drywall.
Smooth vs. Textured Walls
Smooth Surface
Presents a uniform profile with fewer texture-related variations, making material estimation simpler. Coverage relies heavily on specific product formulas and tools.
Textured Surface
Features an irregular surface topography that expands the effective surface area. This means more material may be needed, and application speed can vary.
Porosity and Absorption
Porosity describes how readily a substrate absorbs liquids. Materials like unsealed joint compound, bare wood, and certain masonry surfaces can draw moisture and binders out of wet paint. When coatings soak into a substrate rather than remaining entirely on top, practical coverage decreases. Recognizing high-absorption areas allows you to prepare surfaces properly before applying finish paint.
How Paint Finish Can Affect Application
Paint finish dictates the appearance, sheen, and light reflectivity of a dried coating. Different gloss levels involve varying resin-to-pigment ratios, which can subtly alter flow, leveling, and application feel. Common interior finishes include flat or matte, eggshell, satin, semi-gloss, and high gloss. Always consult the manufacturer's product data sheet for specific coverage guidelines rather than assuming all finishes cover identically.
Common Interior Paint Finishes
Review this general reference table for interior sheen categories:
| Finish | Typical Appearance | Common Uses | Coverage Consideration |
|---|---|---|---|
| Flat / Matte | Low sheen | Ceilings and low-traffic areas | Follow product coverage specs |
| Eggshell | Low to moderate sheen | Living areas and bedrooms | Follow product coverage specs |
| Satin | Moderate sheen | Higher-use areas and hallways | Follow product coverage specs |
| Semi-Gloss | Higher sheen | Trim, doors, and moisture-prone spaces | Follow product coverage specs |
| Gloss | High sheen | Selected trim and architectural details | Follow product coverage specs |
Formulations vary widely by manufacturer; always verify numbers on the paint container.
Manufacturer Coverage vs. Real-World Coverage
Technical data sheets and paint cans provide baseline coverage figures measured under controlled conditions. Real-world results frequently diverge because of surface texture, existing color contrast, application tools, roller nap length, and user technique. Utilizing manufacturer numbers as your primary baseline while adapting to your specific jobsite conditions ensures more realistic material planning.
Application Method Can Affect Paint Usage
Roller Application
Roller nap selection directly influences film thickness and material release across textured or smooth walls.
Brush Application
Brushes handle edges, corners, and detail work, yielding different local film builds than large rollers.
Sprayer Application
Spraying transfers product quickly but requires careful control over speed and distance to manage application rates.
Existing Color Can Affect the Practical Result
While mathematical coverage calculates square footage per gallon, visual hide depends heavily on color transition. Moving from a dark wall color to a bright pastel requires sufficient hiding power. Achieving complete visual uniformity can sometimes necessitate additional coats or specialized tinted bases, separate from standard area calculations.
Surface Condition Matters
Smooth and Sound
Clean, uniform walls provide the most predictable estimation baseline.
Light Texture
Slight surface profiling may alter tool drag and absorption slightly.
Heavy Texture
Pronounced ridges and valleys increase total surface area demands.
Damaged or Uneven
Patches and repairs absorb coatings differently than surrounding areas.
How to Use Coverage Information in a Paint Estimate
Integrating coverage data into your planning workflow involves determining your total paintable area, establishing coat counts, referencing the specific paint product's label, and reviewing site conditions. Factoring in waste allowances separately allows you to determine your final purchase quantity accurately using a reliable Paint Calculator.
Before Using a Paint Coverage Rate
- Check the exact paint product and line
- Read the manufacturer's coverage information
- Identify the specific substrate surface type
- Consider wall texture and material porosity
- Consider the existing coating and color contrast
- Confirm your intended application method
- Account for project-specific environmental conditions
- Treat waste and touch-up allowances separately
Key Takeaway
The number printed on a paint can is a starting point, not a guarantee of identical real-world coverage on every surface. The most reliable estimate combines the manufacturer's product data with accurate measurements and the actual condition of the surface being painted.
The interactive tools available on this platform can help you combine your measured paintable area with the precise coverage rate for the product you intend to use. Utilizing a dependable Paint Calculator ensures your project planning remains accurate and tailored to your exact surface requirements.
Does textured paint use more paint?
Yes, textured surfaces increase the total surface area, which often requires additional coating volume.
Does surface type affect paint coverage?
Porosity, texture, and substrate material directly influence how much paint a wall absorbs.
Does paint finish affect coverage?
Different sheen formulations have unique resin ratios that can subtly impact application and leveling.
What paint finish is best for ceilings?
Flat or matte finishes are commonly selected for ceilings to help diffuse light and minimize glare.
Should I use coverage listed on the can?
Yes, manufacturer data sheets provide the baseline product specification for your calculations.
Why is actual usage different from estimates?
Real-world variables like application technique, roller nap, and substrate absorption alter consumption.
FREE LOCAL PAINTING QUOTES
Too big for a DIY project? Get free quotes from local painting pros.
How Much Does Interior Painting Cost?
How much does interior painting cost? The total depends on paintable area, labor, preparation, paint and materials, number of coats, ceilings and trim, room complexity, and local pricing. Because every home is unique, actual project expenses vary and should be evaluated based on your specific scope of work rather than universal averages.
What Determines Interior Painting Cost?
An interior painting estimate is generally influenced by several key components that shape both labor and material requirements:
Paintable Area
More walls, ceilings, rooms, and surfaces generally mean more labor and materials.
Labor
Professional craftsmanship and time represent a major portion of a painting project budget.
Paint and Materials
Paint quantity, product selection, primer, supplies, and specialty materials affect total costs.
Surface Preparation
Cleaning, sanding, patching, caulking, scraping, and repairs can increase project time.
Number of Coats
Additional coats required for coverage or color changes increase material and labor time.
Room Complexity
Furniture, high ceilings, difficult access, and architectural details affect overall labor.
Interior Painting Cost Per Square Foot
Cost-per-square-foot estimates are frequently referenced in painting project cost discussions, but they can mean different things depending on who is calculating them. A square-foot rate may account for some combination of labor, paint, primer, preparation, materials, number of coats, walls, ceilings, or trim.
Different professionals may calculate square footage based on floor area, wall surface area, total paintable surface area, or overall room count. Homeowners should always clarify exactly what elements are included in a quoted square-foot price before making decisions. Illustrative rates are used purely for planning examples and do not constitute a fixed market guarantee.
How to Estimate the Cost to Paint a Room
Building a reliable painting project estimate involves following a structured workflow:
- Determine the total paintable surface area.
- Establish whether walls, ceilings, trim, doors, or built-ins are included.
- Estimate the required paint and material quantities.
- Account for surface preparation and repair time.
- Estimate labor hours or professional service rates.
- Add any additional project expenses or local pricing factors.
For example, if a project involves 1,000 square feet of paintable surface and a hypothetical painting rate of $X per square foot, the estimated project cost would equal 1,000 multiplied by that rate. This calculation serves solely as an illustrative planning example rather than an official pricing schedule.
Labor vs. Paint and Materials
Labor
Encompasses surface preparation, masking, protecting floors and furniture, cutting in, rolling, brushing, multiple coats, cleanup, difficult access, and wall repairs.
Paint and Materials
Includes wall paint, ceiling paint, primer, rollers, brushes, trays, painter's tape, drop cloths, caulk, patching compounds, sanding supplies, and project-specific items.
The balance between labor and materials shifts depending on room condition, surface repairs, and product tiers.
What Can Increase Interior Painting Costs?
Extensive Preparation
Repairs, peeling paint, cracks, holes, stains, or damaged surfaces increase labor time.
Multiple Coats
Substantial color transitions or porous substrates require more product and time.
Ceilings
Overhead surfaces add total area and require specialized setup and physical effort.
Trim and Doors
Baseboards, crown molding, and doors demand careful brushwork and masking.
High Ceilings
Tall walls and stairwells require ladders, scaffolding, and extra safety measures.
Complex Rooms
Built-ins, tight spaces, heavy furniture moving, and intricate layouts intensify labor.
What Can Help Keep Painting Costs Lower?
Managing your interior painting estimate effectively comes down to smart project planning and preparation:
- Measure spaces accurately to avoid buying excess materials.
- Define the project scope clearly before requesting professional estimates.
- Handle minor surface repairs or cleaning tasks beforehand if tackling DIY work.
- Compare what different contractor proposals actually include rather than looking only at bottom-line prices.
- Choose the appropriate number of coats based strictly on product guidelines and existing wall conditions.
- Avoid purchasing unnecessary specialty add-ons unless required by the surface.
Does Painting the Ceiling or Trim Cost More?
Ceilings, doors, trim, baseboards, and other detailed elements are often priced separately or added to a base wall quote due to the precision and labor required:
| Surface | Possible Cost Consideration |
|---|---|
| Walls | Main paintable surface forming the primary baseline of the project. |
| Ceiling | Additional overhead surface area requiring ladder setup and ceiling-specific paint. |
| Doors | Detailed preparation, hardware masking, and careful application. |
| Baseboards | Precise detail work, cutting in, and floor masking. |
| Window Trim | Intricate geometry requiring specialized brush control and prep. |
| Built-ins | Complex preparation, sanding, and fine-finish application. |
How Preparation Affects Interior Painting Cost
Surface condition is one of the most variable elements in any painting project cost. A straightforward repaint of clean, sound walls requires minimal intervention. Conversely, walls featuring nail pops, cracks, water stains, wallpaper adhesive, or peeling paint demand extensive washing, scraping, sanding, patching, priming, and caulking. Proper preparation ensures long-term coating adhesion but adds noticeable labor hours.
Example Interior Painting Budget
Project Scope: 2 rooms, 1,000 sq ft of estimated paintable surface, 2 coats, walls only, with moderate surface preparation.
1,000 sq ft × Illustrative Rate = Estimated Project TotalIllustrative example — actual contractor and material prices vary significantly by geographic location, project scope, labor rates, and product selection.
Why Interior Painting Estimates Vary
Two homes with identical square footage can receive vastly different professional painting estimates. Variations stem from regional labor rates, wall condition, ceiling heights, trim complexity, prep requirements, furniture density, and the quality tier of paint selected. When reviewing quotes, homeowners should compare the scope of work line-by-line rather than focusing solely on the final dollar figure.
Interior Painting Cost Planning Checklist
- Paintable wall area measurements
- Ceiling surface area evaluation
- Doors, windows, and trim inventory
- Surface preparation and repair scope
- Required number of paint coats
- Paint, primer, and tint selections
- Application supplies and masking materials
- Labor hours or professional service fees
- Additional wall or drywall repairs
- Furniture moving and floor protection needs
- Cleanup and waste disposal requirements
- Contractor estimate inclusions and exclusions
- Local market pricing factors
An accurate paint quantity estimate helps establish the materials portion of your overall painting budget. By entering your room dimensions into a reliable Paint Calculator, you can determine exact product needs, while labor, preparation, trim, ceilings, and other project-specific factors can be factored in separately.
How much does it cost to paint a house interior?
Total cost depends on paintable area, labor, preparation, materials, coats, ceilings, trim, and local pricing variations.
How much does it cost to paint one room?
Room size, wall height, surface condition, coat count, ceiling scope, and labor rates all influence individual room estimates.
Is interior painting priced per square foot?
Some professionals use square-foot pricing, while others price by room, project scope, labor hours, or a combined assessment.
What is included in an interior painting estimate?
Estimates commonly cover prep, painting, and cleanup, but homeowners should verify whether ceilings, trim, and repairs are included.
DIY Painting vs. Hiring a Professional
Is it cheaper to paint yourself or hire a professional? DIY painting can reduce direct labor expenses but requires the homeowner to provide their own time, preparation, tools, and labor, while professional painting adds labor costs but may reduce the homeowner's time commitment and provide specialized equipment and experience.
DIY Painting vs. Professional Painting at a Glance
Review this comparison of major project aspects:
| Factor | DIY Painting | Professional Painter |
|---|---|---|
| Labor | Homeowner provides labor | Contractor provides labor |
| Materials | Homeowner purchases | May be supplied by contractor |
| Tools | Homeowner provides or purchases | Professional typically has required tools |
| Time | Requires homeowner's time | Reduces homeowner's hands-on time |
| Preparation | Homeowner handles preparation | May be included depending on scope |
| Complexity | Depends on homeowner experience | Professional handles project complexity |
| Scheduling | Flexible around homeowner's schedule | Based on contractor availability |
| Cost Structure | More direct material/tool expenses | Includes labor and contractor overhead |
Actual arrangements vary by contractor, product choice, and project scope.
What Does DIY Painting Cost?
A do-it-yourself project involves several distinct material and supply outlays:
Paint
Wall, ceiling, trim, or specialty paint as required by the project specifications.
Primer
May be needed depending on the existing surface condition and product guidelines.
Rollers and Brushes
Application tools may need to be purchased, upgraded, or replaced for the job.
Painter's Tape
Used to protect edges and create clean transitions between different surfaces.
Drop Cloths and Protection
Used to shield floors, furniture, fixtures, and hardware from paint splatters.
Preparation Supplies
May include patching compound, sandpaper, caulk, cleaning solutions, and scrapers.
What Does a Professional Painter Cost?
Professional painting estimates commonly reflect more than the cost of paint alone. Contractors factor in labor, preparation, masking, protection, application, multiple coats, specialized equipment, transportation, cleanup, and business overhead. Professionals may price work by room, by total project, by square foot, by labor hours, or through a combination of these elements.
Prices vary extensively based on local market rates, project difficulty, and the specific scope agreed upon. Any numerical examples should be viewed as illustrative estimates rather than guaranteed market pricing.
DIY vs. Professional: The True Cost
Evaluating the true cost of a painting project goes beyond immediate store receipts. Understanding where your resources go helps clarify the decision:
DIY Cost Factors
Potentially includes paint, primer, tools, supplies, preparation materials, equipment rental, personal time investment, and cleanup efforts.
Professional Cost Factors
Potentially includes labor, paint, materials, specialized preparation, professional equipment, surface protection, skilled application, cleanup, and contractor overhead.
DIY painting reduces direct monetary labor expenses, but the homeowner supplies the labor and personal time. Professional services cost more in direct financial terms because specialized labor and overhead are included.
How Much Time Does DIY Painting Take?
Time is a major commitment in any DIY painting project. The overall duration depends on room size, surface condition, and experience:
Preparation
Moving furniture, protecting floors, cleaning walls, repairing damage, sanding, and masking surfaces.
Painting
Cutting in edges, rolling walls, brushing trim, and applying additional coats as required.
Drying and Recoating
Waiting for products to cure properly according to manufacturer drying instructions.
Cleanup
Washing tools, removing tape, disposing of waste, and restoring the room to normal use.
When DIY Painting May Be Practical
Small Project
A single room or a limited wall area is often manageable for weekend schedules.
Simple Layout
Straightforward walls with good accessibility reduce physical complexity.
Sound Existing Surfaces
Well-maintained walls require less intensive repair and preparation work.
Flexible Schedule
DIY allows work to proceed at your own pace around personal availability.
Willingness to Learn
Homeowners comfortable learning painting techniques can handle standard projects.
Existing Tools
Already owning rollers, trays, and brushes reduces upfront tool expenses.
When Hiring a Professional May Be Worth Considering
Large Projects
Multiple rooms or an entire home's interior require substantial time investments.
Extensive Preparation
Damaged, peeling, or heavily repaired surfaces demand professional remediation.
High Ceilings
Tall walls and stairwells require ladders, scaffolding, and safety equipment.
Difficult Areas
Complex architectural layouts and hard-to-reach spaces increase project difficulty.
Tight Schedule
Homeowners with limited free time benefit from outsourced labor and speed.
Specialized Requirements
Certain specialty finishes or tricky substrates require professional expertise.
Skills and Quality Considerations
Producing a clean, professional-looking interior finish involves specific manual skills, including disciplined cutting-in, maintaining a wet edge, managing roller pressure to prevent stippling, and executing clean masking lines. While these skills can be learned with practice, experience often increases efficiency and consistency. The final outcome depends heavily on preparation, tool selection, product quality, and attention to detail.
Hypothetical Painting Project Comparison
Project Scope: 2 interior rooms, 1,000 sq ft of paintable surface, walls only, moderate preparation.
DIY Scenario Structure
Paint materials + sundries + tools + supplies + preparation items + personal time investment.
Professional Scenario Structure
Contractor labor + materials + surface preparation + specialized equipment + overhead and project management.
Illustrative example only — actual costs vary by geographic location, project scope, labor rates, materials, and contractor selection.
Questions to Ask Before Hiring a Professional Painter
- What specific surfaces are included in the quote?
- Are ceilings included in the estimate?
- Are doors, windows, and baseboard trim included?
- Is surface preparation and repair included?
- How many coats of paint are included?
- Who supplies the paint and primer products?
- Are primer and other materials factored into the price?
- Is furniture moving and floor protection included?
- What cleanup and waste disposal steps are performed?
- What is the expected project timeline and work schedule?
- Is the estimate fixed or subject to change?
- What payment terms and deposit structures apply?
DIY Painting Planning Checklist
- Define the complete project scope and target rooms
- Measure all wall and ceiling surfaces accurately
- Identify walls, ceilings, trim, and doors requiring work
- Check surface conditions for cracks, holes, or stains
- Determine preparation and repair requirements
- Calculate paint and material quantities needed
- Gather necessary rollers, brushes, trays, and tape
- Protect furniture, flooring, and fixtures
- Plan a systematic painting sequence
- Allow appropriate drying and recoat intervals
- Organize cleanup supplies and waste disposal
- Weigh the value of your available personal time
How the Paint Estimate Fits Into the Decision
Knowing your expected paint quantity helps establish the material portion of your budget. By using a reliable Paint Calculator, you can determine exact product needs for your walls and ceilings. However, the total cost of a painting project also depends heavily on labor, preparation, tools, supplies, trim work, repairs, and contractor pricing structures.
Final Takeaway
DIY and professional painting each involve different combinations of money, time, labor, preparation, equipment, and project complexity. Comparing the full project scope and available personal resources helps homeowners make an informed choice that aligns with their budget, schedule, and quality expectations.
Is it cheaper to paint a house yourself?
DIY eliminates professional labor charges but still requires purchasing paint, tools, and supplies, plus investing your own personal time.
How much does it cost to hire a professional painter?
Professional estimates vary by location, project size, prep requirements, labor rates, materials, and overall scope.
How long does it take to paint a room yourself?
Timing varies based on room size, surface preparation, coat counts, drying intervals, experience, and cleanup.
Should I hire a professional for a large project?
Homeowners should consider project size, complexity, available time, surface condition, access height, and personal experience.
FREE LOCAL PAINTING QUOTES
Too big for a DIY project? Get free quotes from local painting pros.
Frequently Asked Questions
Planning a painting project involves accurate surface measurements, proper coat counts, and product coverage considerations. Use this comprehensive FAQ guide alongside our Paint Calculator to ensure precise material estimates, proper coverage, and a professional finish for your home improvement projects.
No matching questions found
Try searching using different keywords like "gallons", "coverage", "doors", or "primer".
A paint calculator estimates the amount of paint required by combining paintable surface area, number of coats, product coverage, deductions, and any selected waste allowance. Actual purchase quantities can vary because paint is sold in specific container sizes and real-world coverage depends on the product and surface.
Determining how much paint do I need depends on room dimensions, wall height, doors and windows, whether the ceiling is included, the number of coats, and overall paint coverage. A quality paint quantity calculator combines these specific inputs to estimate the required volume.
To find how many gallons of paint do I need, use the standard formula: gallons needed equals paintable area times coats divided by coverage per gallon. For example, 1,000 sq ft times 2 coats divided by 350 sq ft per gallon equals approximately 5.71 gallons. This is the theoretical quantity before considering waste and actual container sizes.
Paint coverage per gallon depends on the specific product and surface. The manufacturer's stated coverage should be used as your primary reference. Key factors affecting paint coverage include surface texture, porosity, existing color, application method, paint type, and surface preparation.
Doors and windows generally reduce the paintable area when they are not being painted. A more precise wall paint calculator subtracts their surface area from the gross wall area. While very small openings have minimal effect, larger or numerous openings significantly impact the calculation.
Ceilings should be calculated separately when they are being painted using the basic rectangular formula: ceiling area equals length times width. A dedicated ceiling paint calculator helps because overhead paint often features different product specifications, finishes, or coverage rates than wall paint.
The number of paint coats depends on product instructions, existing surfaces, color transitions, surface condition, coverage efficiency, and application methods. One coat may suffice in some refresh scenarios, while two or more are often appropriate for dramatic color changes or new construction.
Accounting for paint waste helps cover application losses, spills, uneven absorption, complex architectural surfaces, touch-ups, and future repairs. There is no single universal waste percentage, so users can choose an allowance based on their specific interior painting project conditions.
Primer should generally be estimated separately when required using the formula: primer needed equals primed area times primer coats divided by primer coverage. Primer is especially useful for new drywall, porous surfaces, repaired areas, stains, and major color transformations.
Textured or porous surfaces consume more coating than smooth walls because surface profile and absorption rates alter overall paint coverage. Always base your calculations on manufacturer guidelines and the unique characteristics of your specific surface.
While the core mathematical principle is similar, walls and ceilings should be treated as separate surfaces due to differing dimensions, specialized products, distinct coverage rates, and varying numbers of required coats.
The calculated quantity is a theoretical estimate and rarely matches standard retail container sizes exactly. Homeowners typically round up to the next available container size, factoring in a modest paint waste allowance to ensure they do not run short mid-project.
One U.S. gallon is approximately equal to 3.785 liters, and 1 U.S. gallon equals 4 U.S. quarts. Keep in mind that container sizes vary by country and manufacturer, and U.S. gallons should never be confused with Imperial gallons when converting metric quantities.
A standard paint calculator estimates material quantity rather than total cost unless pricing inputs are included. Total project expenses also involve labor, preparation supplies, primer, tools, trim work, repairs, and local contractor rates, making paint quantity and cost separate calculations.
Ready to Calculate Your Paint Requirements?
Plug your exact dimensions into our interactive Paint Calculator to instantly determine precise gallons, container sizes, and total material needs.
Our Trusted Sources
Our paint coverage calculations, dry time parameters, and surface preparation formulas are built upon verified guidelines from leading paint and coatings associations, architectural standards bodies, and industry experts.
Accurate paint volume calculations and reliable project estimates depend on precise mathematical formulas, standard surface area subtractions for doors and windows, and proper coat allowances. By aligning our calculator's algorithms with American Coatings Association guidelines and Painting Contractors Association recommendations, we ensure that every gallon estimate and material breakdown matches real-world professional painting standards.
Related Calculators
Calculate surface areas, estimate primer requirements, determine wallpaper rolls, and plan complete room renovation expenses with our suite of specialized home improvement tools.
Wallpaper Calculator
Determine the exact number of wallpaper rolls, pattern repeats, and extra material needed for accent walls and full room makeovers.
Launch Calculator →Flooring Calculator
Calculate square footage, flooring planks, tiles, and waste percentages for hardwood, laminate, vinyl, and tile installations.
Launch Calculator →Tile Calculator
Estimate the number of ceramic, porcelain, or stone tiles along with mortar and grout quantities for floors, showers, and backsplashes.
Launch Calculator →Room Area Calculator
Quickly compute wall dimensions, ceiling areas, perimeter lengths, and total room square footage to streamline your painting plans.
Launch Calculator →